Aug 07

Friday Post: Raspberry Pi iBeacon

Hey All,

Now that Hack Day at the office is out of the way, I would like to post about what I learned and some examples to get you started.  The following is some example code and an introduction to iBeacons.

Setting up a Raspberry Pi to be an iBeacon

Longer guide available here: Adafruit PiBeacon

On a fresh install of Raspbian, login to the terminal and type:

sudo apt-get update
sudo apt-get install libusb-dev libdbus-1-dev libglib2.0-dev libudev-dev libical-dev libreadline-dev

Next we want to download, build, and install BlueZ, a bluetooth stack for Linux and the Raspberry Pi.

sudo mkdir bluez
cd bluez
sudo wget www.kernel.org/pub/linux/bluetooth/bluez-5.11.tar.xz
tar xf bluez-5.11.tar.xz
cd bluez-5.11
./configure --disable-systemd
make
sudo make install

Now that BlueZ is installed, plug in your Bluetooth Adapter and reboot your Pi with:

sudo reboot

When it is finished rebooting, log back in and go into the bluez folder by typing:

cd bluez/bluez-5.11

Check that your bluetooth device is listed by running:

tools/hciconfig

You should see a few lines appear about hci0 and that it is currently down.

Issue these commands to bring up your bluetooth device:

 sudo tools/hciconfig hci0 up
sudo tools/hciconfig hci0 leadv 3
sudo tools/hciconfig hci0 noscan

Now we are going to turn the device into an iBeacon.

 sudo tools/hcitool -i hci0 cmd 0x08 0x0008 1E 02 01 1A 1A FF 4C 00 02 15 E2 0A 39 F4 73 F5 4B C4 A1 2F 17 D1 AD 07 A9 61 01 00 00 01 C8 00

The long set of character E2 0A 39 F4 73 F5 4B C4 A1 2F 17 D1 AD 07 A9 61 is actually the iBeacon’s ID.

The next four numbers: 01 00 are the major id and show up as 100.

The next four numbers 00 01 are the minor number and show up as just 1.

You don’t have to worry about the numbers before E2 and after the minor value 00 01.

You can set the major and minor to anything from 0 to 9999. This is how you will be able to tell apart different beacons in your app. The app is currently set to recognize Major 100 Minor 1 and Major 100 Minor 2.

If you change these numbers on your device, make sure to update the app.js code as explained below.

If you reboot your Pi, you will find that the bluetooth device has been reset and that it is no longer functioning as an iBeacon.

To fix this we are going to edit /etc/rc.local.

sudo nano /etc/rc.local

You will want to place the following code above the exit 0 at the end of the file.

sudo /home/pi/bluez/bluez-5.11/tools/hciconfig hci0 up
sudo /home/pi/bluez/bluez-5.11/tools/hciconfig hci0 leadv 3
sudo /home/pi/bluez/bluez-5.11/tools/hciconfig hci0 noscan
sudo /home/pi/bluez/bluez-5.11/tools/hcitool -i hci0 cmd 0x08 0x0008 1E 02 01 1A 1A FF 4C 00 02 15 E2 0A 39 F4 73 F5 4B C4 A1 2F 17 D1 AD 07 A9 61 01 00 00 01 C8 00

Press ctrl-x then y to save and quit.

Now reboot your Raspberry Pi and it should become an iBeacon on startup.

Application Side

We are now going to create the iBeacon app. The instructions below are to do this on a Mac with XCode, PhoneGap, and an iOS device with a developer subscription.  You can also do this on Android with Linux, OS X, or Windows, the Android SDK, and PhoneGap.

First, you want to install cordova. On a Mac or Linux machine use:

npm install -g cordova

(If you don’t have NPM on a Mac install the amazing tool Homebrew and then install node.js)

Then create your app directory:

cordova create beacon com.yourname.beacon beacon
cd beacon
cordova platforms add ios

(for android do cordova platforms add android, but make sure the android sdk is installed)

Add some basic plugins:

cordova plugin add org.apache.cordova.device
cordova plugin add org.apache.cordova.console

and the ibeacon plugin:

cordova plugin add https://github.com/petermetz/cordova-plugin-ibeacon.git

Now lets rename the www folder in the folder. We don’t need it, it’s the default phonegap application, but it could be a useful example later.

mv www www.example

Now let’s clone the ibeacon example!

git clone https://www.github.com/ssilverm/ibeacon-www www

Edit lines 7 – 23 of app.js to match the ID, Major, and Minor of your beacons. They will trigger the page changes on your device.

app.beaconRegions =
  [
	{
		id: 'Page1',
		uuid:'E20A39F4-73F5-4BC4-A12F-17D1AD07A961',
		major: 100,
		minor: 1
	},
	{
		id: 'Page2',
		uuid:'E20A39F4-73F5-4BC4-A12F-17D1AD07A961',
		major: 100,
		minor: 2
	},


  ]

You can see how the above code is set to the same as the iBeacon we set up above, as well as another beacon with the minor value set to 2.

The next steps are how to build your iBeacon app for an ios device like an iPhone or iPad. I don’t have an Android device, but as long as you have the Android sdk the functions should be the same. Change ios for android.

When you have finished editing app.js, save it and then type:

cordova build ios

After a few minutes your terminal should read Build Succeeded.

Open the platforms/ios folder and double click on the beacon.xcodeproj file to launch XCode. With your device connected you should be able to run your app on the device.

Make sure location services are enabled for the app.

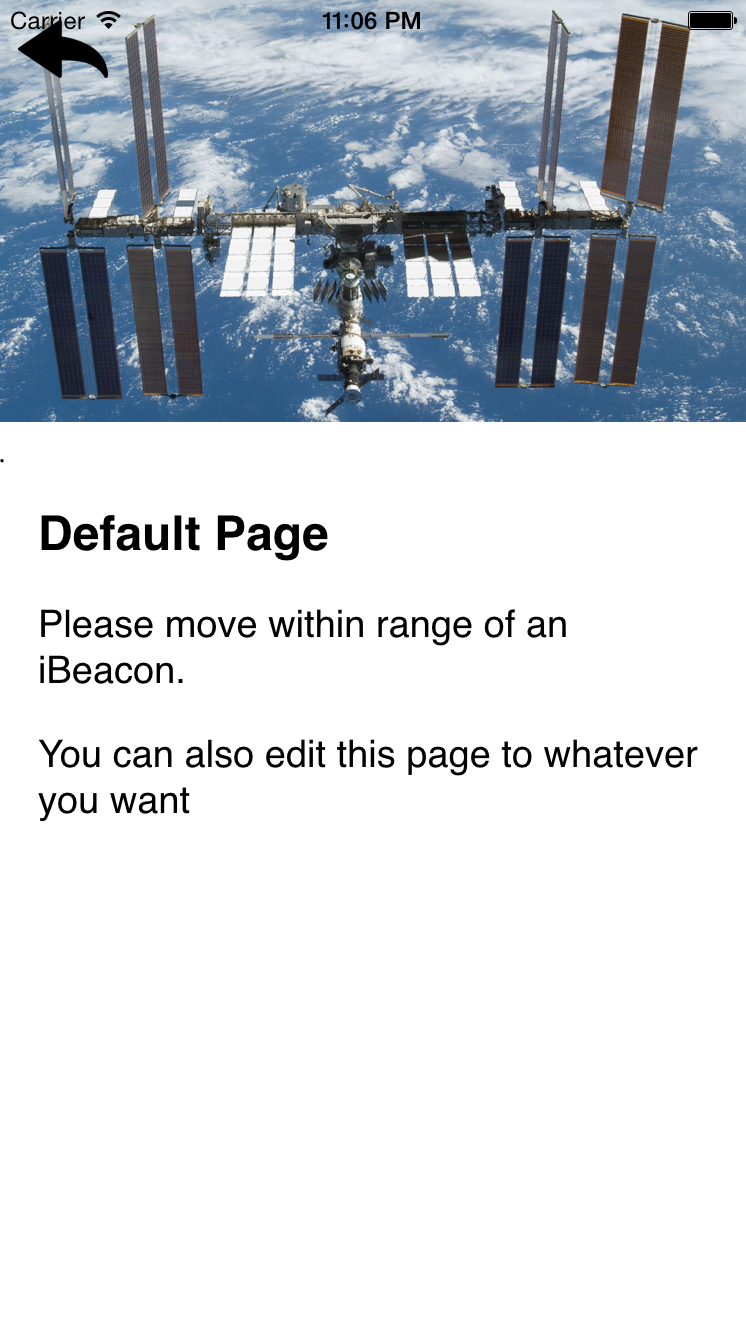
Now go walk around to where you set up the beacons and the pages should automatically change as you get closer to them. It will also revert to the main page as you move out of range.

Screen Shot 2015-08-07 at 11.06.17 PM

I hope this has been helpful!

Have a great weekend all!

-Shea

GitHub Code: https://github.com/ssilverm/ibeacon-www
 

Jan 23

Friday Post: Javascript for Kids Review & iOS dev needed

Hey All!

So my 31st birthday was great.  Got a Gamecube controller adapter for the Wii U, had some 8 player smash battles, and my wife made me an awesome Pokemon cake!

IMG_4703

PiPlay iOS App

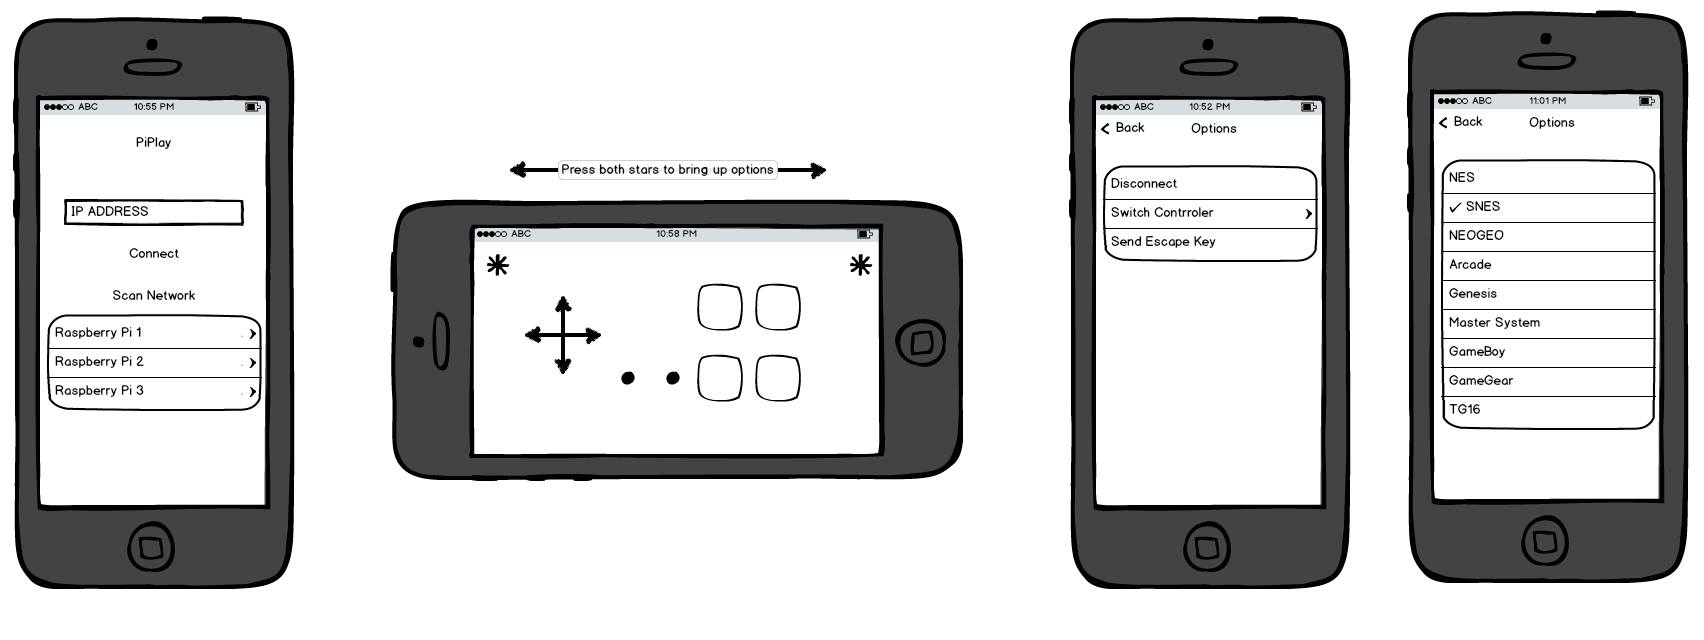
So one of the items I have been working on on the side for PiPlay is a remote controller option.  I have the backend working.  A daemon sits on the Pi as a virtual keyboard (using udev) waiting for a specific HTTP request which is then interpreted and issued a keypress.  It’s really cool to see in action, but ugly as all get out.

This is why I am asking if anyone has any iOS design / dev experience, I would love to chat with you and hopefully work together on this as an open source project.

10935506_10103804677807022_1324185694_o

My not so impressive mockup skills 🙂

Book Review: Javascript for Kids

Javascript For Kids is the next book in the “For Kids” series from No Starch Press.  When they originally sent me the Python For Kids book, I was really excited.  It was my first time reviewing a book, and it was an amazing text in its own right.  So when they told me Javascript For Kids was available, I jumped at the chance to review a copy.

I’m going to say this outright: I like Python For Kids better.

Javascript For Kids takes you from zero programming experience, all the way to programming graphics and mini games using the canvas tag.  Whereas Python For Kids was very easy to read and hard to put down, I find this book to be information dense, and a little overwhelming at parts.  The author knows his stuff, and the information is clear and well written, but I wish the book was paced a little slower.

That said the examples used are lots of fun, and the audience will probably enjoy writing and expanding on the included code.

No Starch landed a 10 / 10 on Python For Kids, which set the bar extremely high.  I’m giving Javascript For Kids a 7.5 out of 10.  It’s deserving of the For Kids title, and I eagerly await the next book in the series.

Have a good weekend all!

-Shea

Jan 17

Friday Post: 31

Hey All,

So I’m 31.  I feel like this year is going to be amazing.  I’ve felt burnt out on a few things, been struggling to find time to do everything I wanted.  But this year I’m going to work on better time management.

I’ve finished the tough part of my book, the writing portion.  The revisions are also done.  All thats left is to proof read the final copy when it’s ready.  This book took a lot out of me.  If I say I’m writing another book after this, punch me.

My goals this year are:

  • PiPlay
  • Finish some of my game backlog
  • Release a Swift app

I’m currently working on a swift based controller that interfaces with PiPlay.  I’m excited about it.  The code is done, but the design is ugly.  If you are good with Xcode / app design, shoot me an email!

This weekend is Otronicon at the Orlando Science Center.  It’s a convention filled with Digital Media, Gaming, and Simulation.  If you are in Orlando you should check it out.

Have a great weekend!

-Shea

Mar 27

PhoneGap 1.5.0 and iOS 5.1

Hey All,

Just posting here so I remember some fixes I had to do with the new release of PhoneGap 1.5 (also known as Cordova).

When you initially run your new xCode product, you will get a ton of “semantic” issues.  The fix is to go to Build Settings -> Objective-C  Automatic Reference Counting -> “NO”

I found this clarification from a comment posted by Alejandro Orduz at http://phonegap.com/2012/03/06/phonegap-1-5-released/ 

“ok, i manage to make it work, Cordova, under Xcode 4.3.1…. regarding the www stuff…

First of all, getting into this painful process(more of all because of my lack of knowledge of Xcode), i wen to the process to upgrade my iPhone to the latest iOS 5.1, then had to upgrade Xcode to 4.3.1 to support testing in this device, but also did an upgrade to the latest lion 10.7.3…. so it was a boring weekend of upgrading….

The first time you run a new phone gap project under Cordova, is not like old days, now when you run you get a scary 9 errors warnings about a Semantic Issue in some, NSAutoreleasePool well, for some of us, that is like speaking chinease… but it can be solved very easy… the new Xcode has some Automatic Reference Counting ON by default, so you just go to the project Build Settings, find Objective-C  Automatic Reference Counting and change it to “NO”, after that everything goes to normal…. then it can build, add the www, you get the normal iPhone simulator error, and then, like before, had to drag and drop the www folder into the project root….

Changes like this are very scary for people like me, that found phonegap an amazing tool to build mobile apps with our web development knowledge…. :-{  ”

Also! I finally got the camera example working.  I was receiving a weird “wait_fences: failed to receive reply: 10004003” when I used the Camera example code verbatim.  It would work, but I would only recieve a small blue box on my iPhone.

The issue is that the code on line 40:

smallImage.src = “data:image/jpeg;base64,” + imageData;

is wrong.  PhoneGap 1.5 / iOS 5 stores the taken photo in a temporary directory, so you dont get the base64 data anymore, you have the actual URI for the photo in imageData.  All you need to do is change line 40 to be:

smallImage.src =  imageData;

and it will work.


I hope this helps out some people.  It’s working for me, YMMV.

-Shea