I write this with such relief that my family was able to get fully vaccinated against COVID-19. This week we both got our second shots.
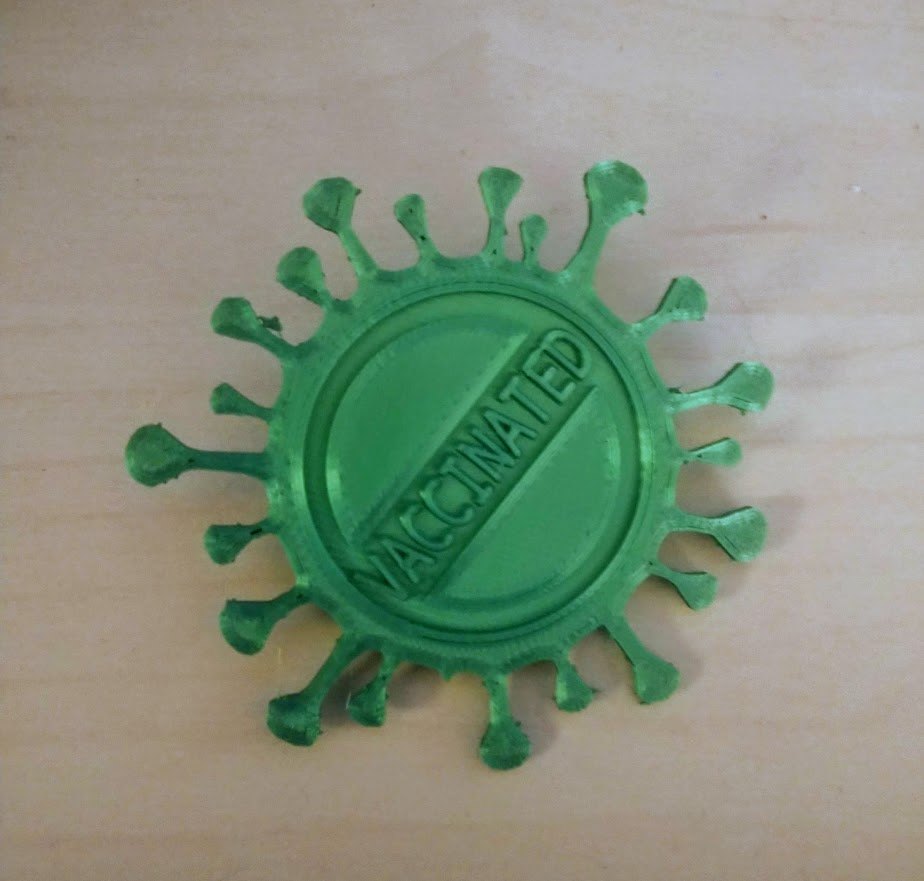
Decided I had to model a COVID Buster pin to let the world know 😀
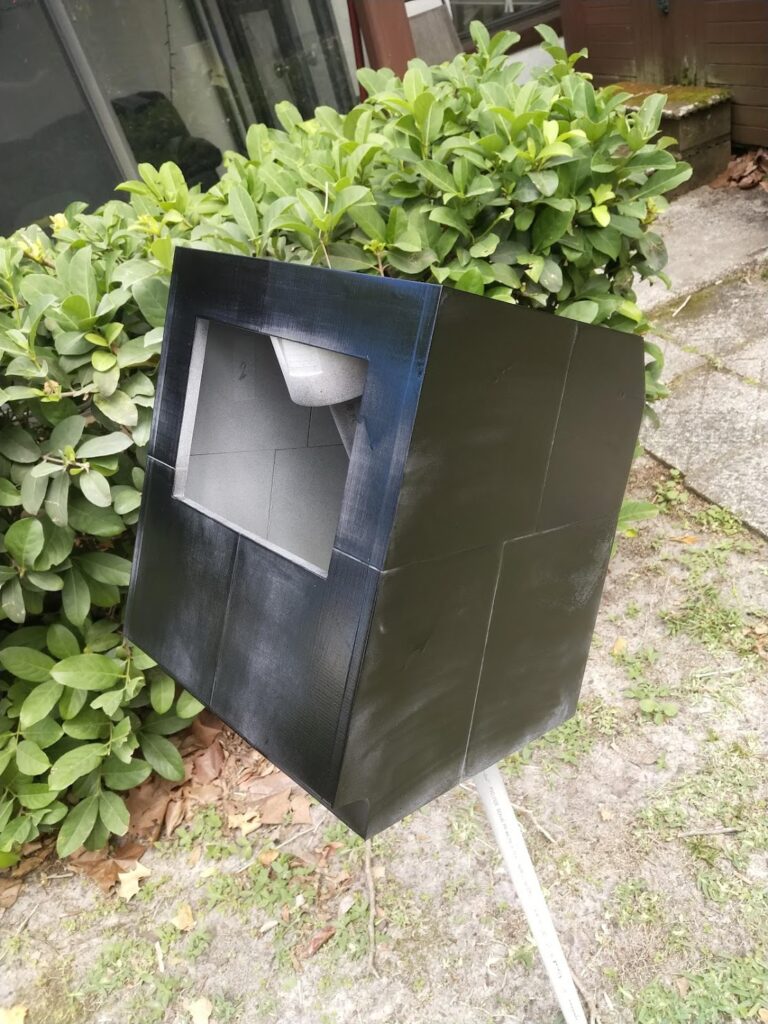
Mac Mini Classic
In other modeling news, I have started to work on a 3D printed Mac Classic shell that can fit on top of a Mac Mini (M1) and connect to a modern 8″ 4:3 LCD panel.
So, I’ve been reflecting on the past year and the past month, the things I’ve made and the things I haven’t. I’ve come to the conclusion that for this year I only want to put my energy into projects I know how to complete or have the capability to do.
I know that sounds wishy washy but I have a TON of unfinished projects on my backburners, and I needed to tell myself I will NEVER finish those. So it’s time to move on, clear the clutter, and finish the projects I can finish, and start the projects I can complete 😀
On Deck To Complete
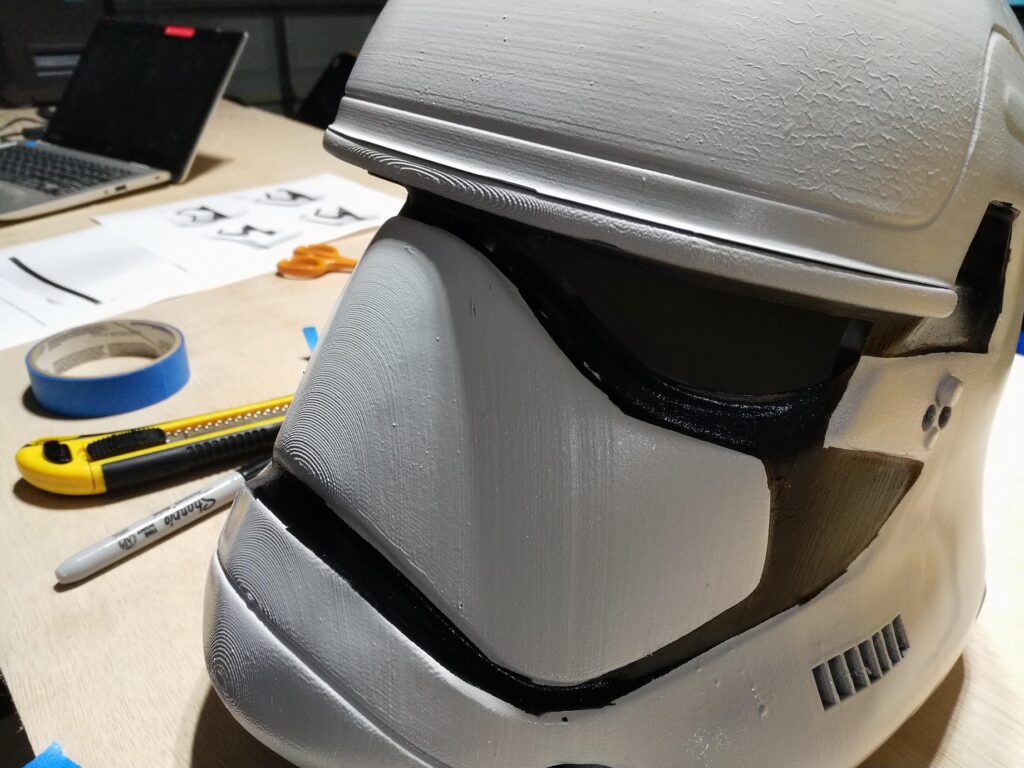
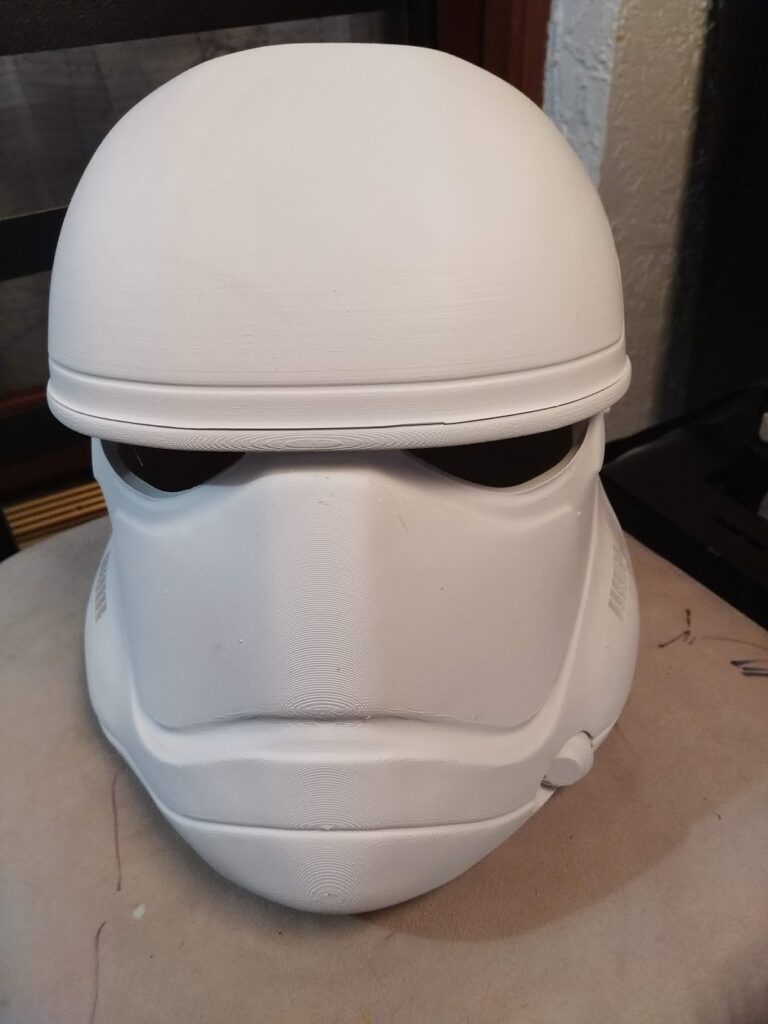
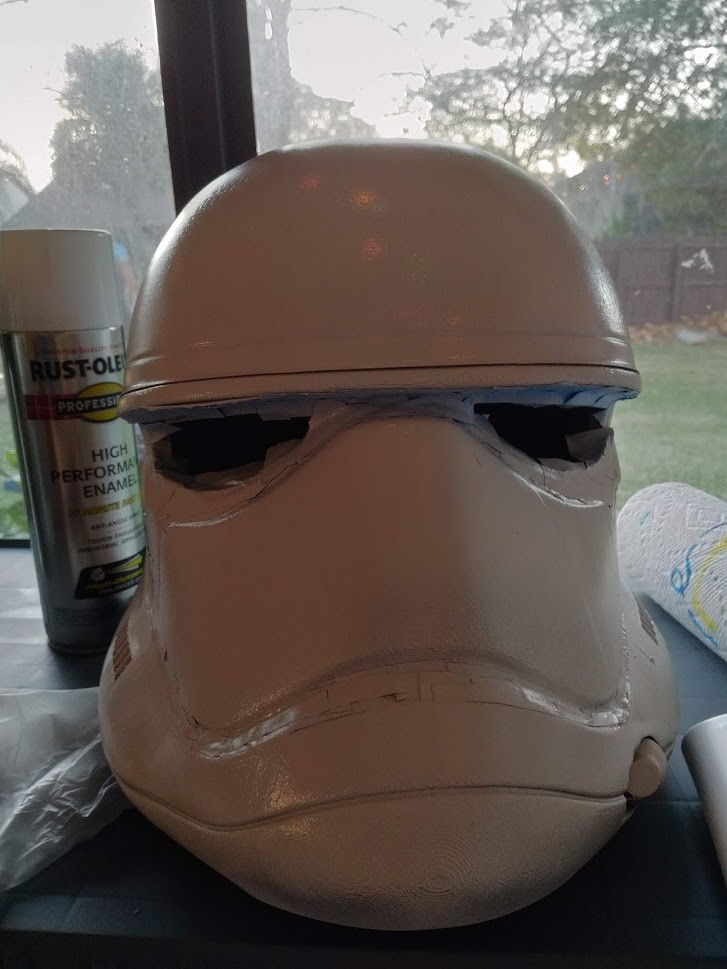
My First Order Stormtrooper helmet. I’ve been working on this thing since 2017. I love the look of the helmet, and I’ve printed about 4 different complete ones but they always never felt good enough. The finish wasn’t good. I didn’t know how to sand well enough, etc. Excuses.
Primed, badly sanded, sitting on my shelf…
I’ve had this dude sitting on my shelf for 6 months. I started this when the pandemic started, and then got discouraged after I saw the imperfections and mess ups. So this weekend I said screw it. I’m going to finish it, imperfections or not. I will use what I gain from this one to make the next helmet even better!
Here’s how the weekend went:
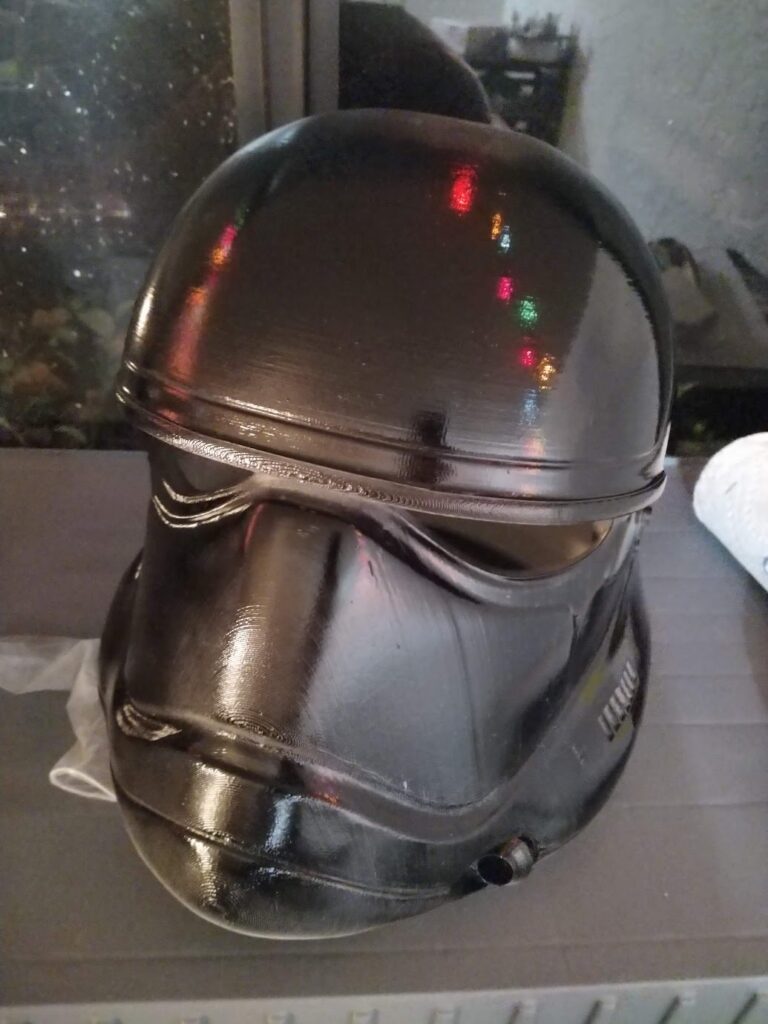
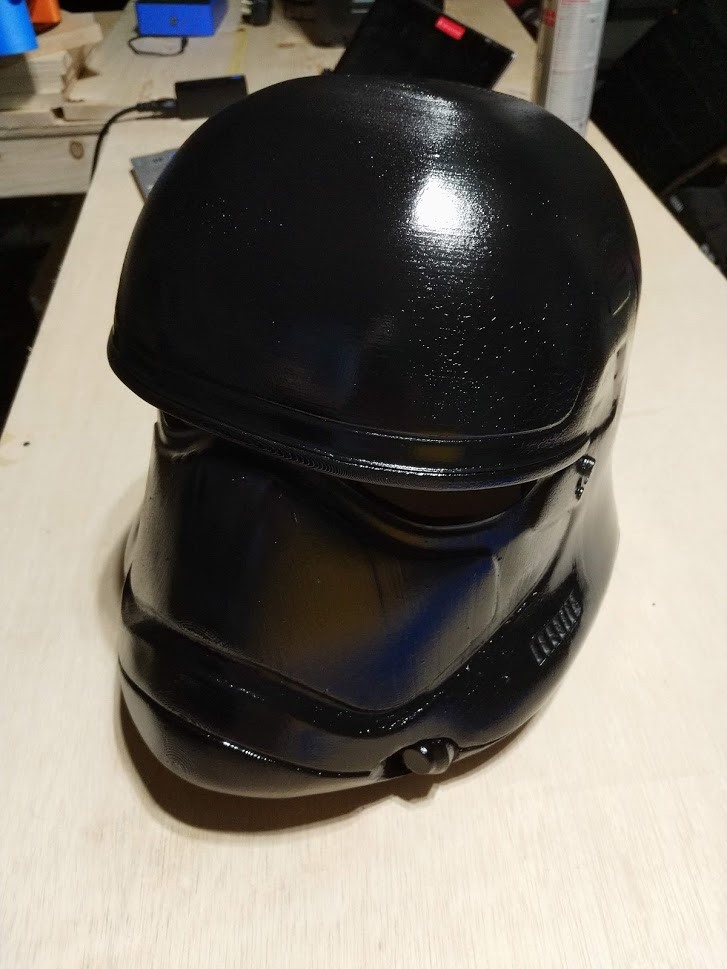
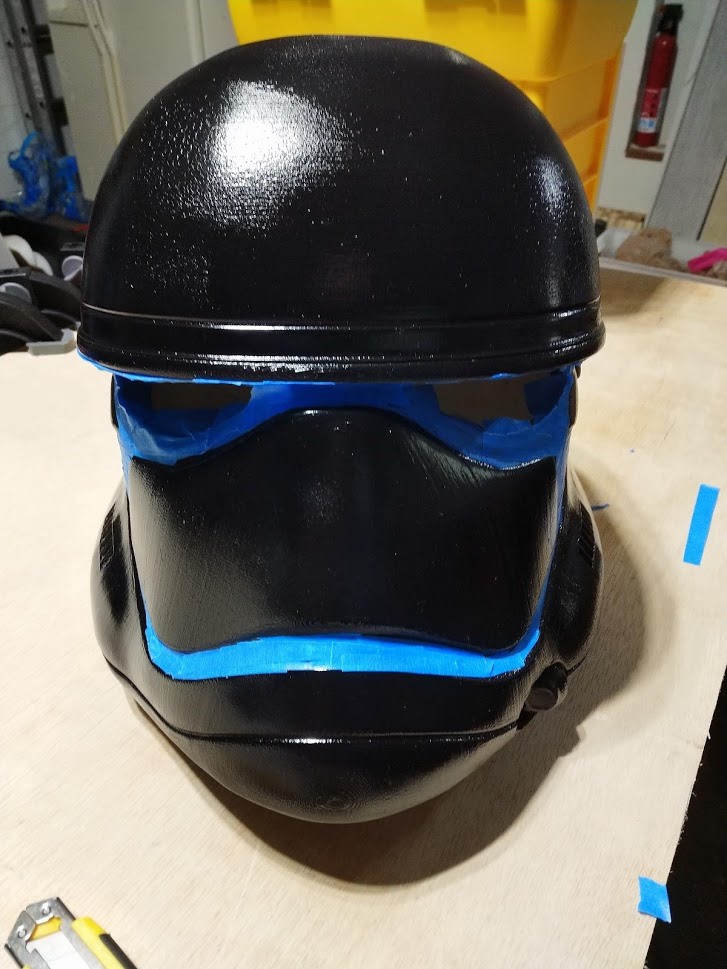
First coat of black spray paint!Second coat!Lots of trial and error with masking.First coat of white over the masked elements.
I think I got pretty far! Painted black as a first coat, masked, then painted over white. I’m going to do the second coat tomorrow then expose the masked area.
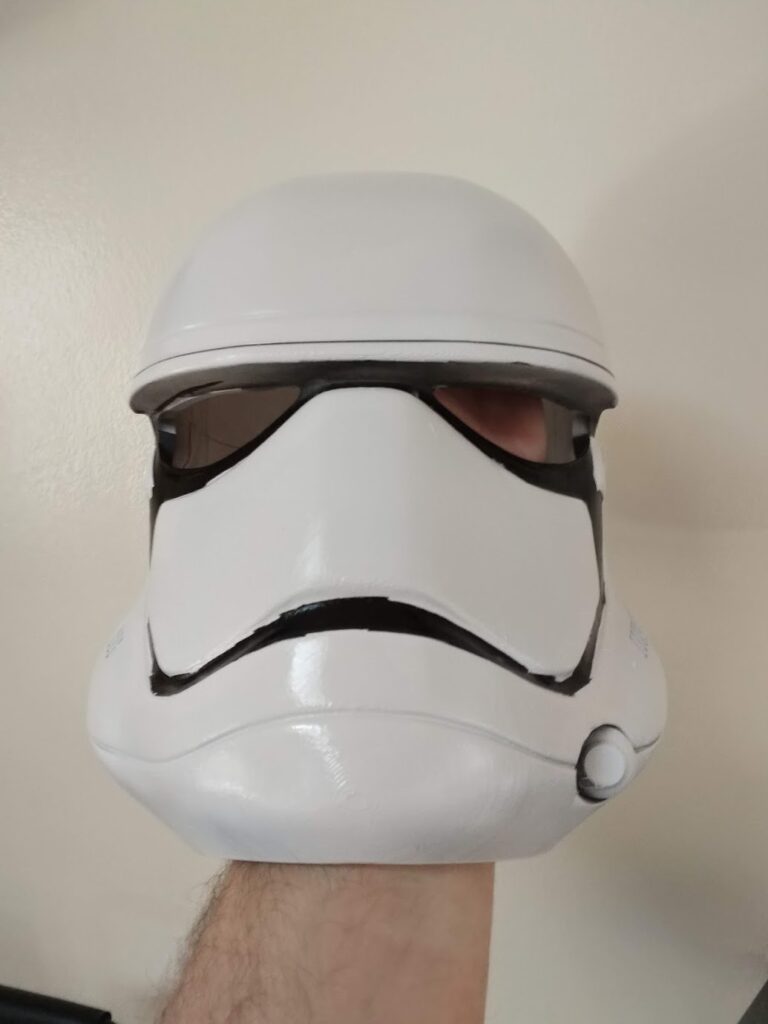
My masking attempt is not great, but I can only just touch it up. Perfect is the enemy of good here. I also saw an awesome technique on how to make the eyes: Document folders! They are a great source of dark see through plastic. You cut it out and tape it to the inside of the helmet and BAM! Instant visor!
Stepmania Raspberry Pi Dance Pad.
This is something I have no idea how to finish yet, BUT I have an idea on where to start. Using FSRs works. The prototype works. But I want to build something nice. I think I am going to try to make some custom FSR PCBs and install them into 2020/1515 aluminum extrusion.
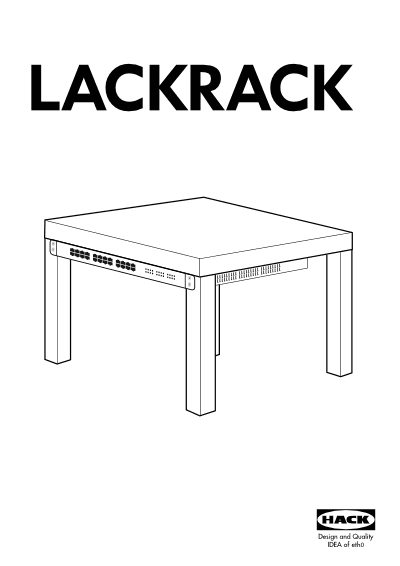
IKEA Lack Table Server Rack
I have an old xServe Mac 1U server, and a bunch of home lab equipment sitting in my garage. I’ve wanted to revamp my home network and move everything outside a shelf in my closet and “properly” set it all up.
I’m thinking of using the IKEA Lack Rack project as my base.
While this is definitely low priority for me, it would make me feel better having it all in some semblance of an organized mess.
2021 Maker Faire
I’m currently going through some thoughts and idea for what will hopefully be Maker Faire Orlando 2021. 2020 got shelved due to COVID, but I’m hopeful 2021 will be on.
I’m looking forward to tackling my projects this year, and hey, actually completing things.
Well this has been a week! Here’s to hoping President Biden can usher in some new progressive policies and finally have a government that takes the Coronavirus Pandemic seriously. All I want is my vaccination ASAP!
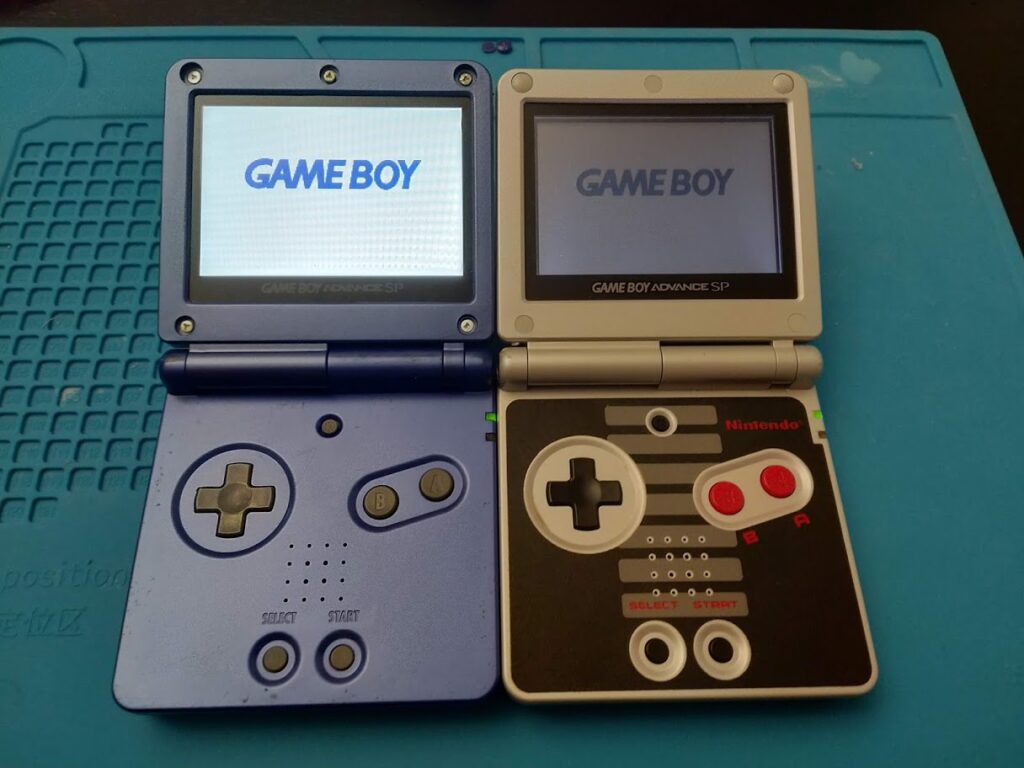
Tryign to take my mind off everythign I’ve been throwing myself into lots of projects that I KNOW I can complete. One of those was to upgrade one of my older GBA SP AGS-001 consoles with an awesome IPS LCD screen.
The difference between the original frontlit screen versus the new one is night and day!
This is a time-lapse of me refurbishing and upgrading a beat up original Japanese imported GameBoy Advance that used a front-lit screen.
I take it apart, clean it all out, then replace the screen with a back-lit IPS LCD and new casing for the screen.
The actual hardware swap took less than an hour including soldering the LCD brightness control wire and then me messing up and forgetting to put in the hinge locking screw the first time around.
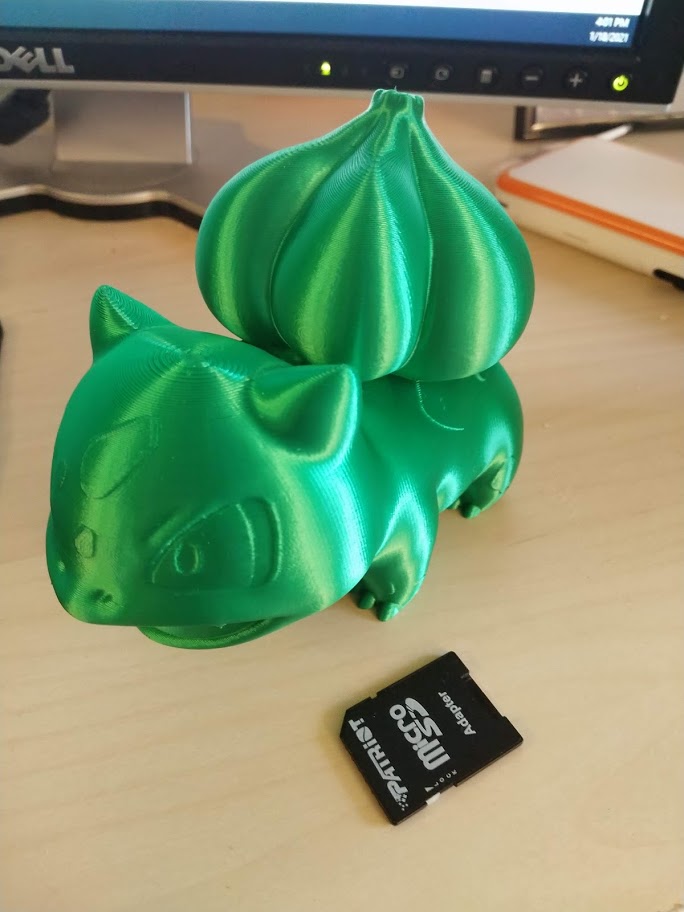
I also found some awesome shiny “silk” green PLA filament and printed this giant Bulbasaur!
It came out so great!
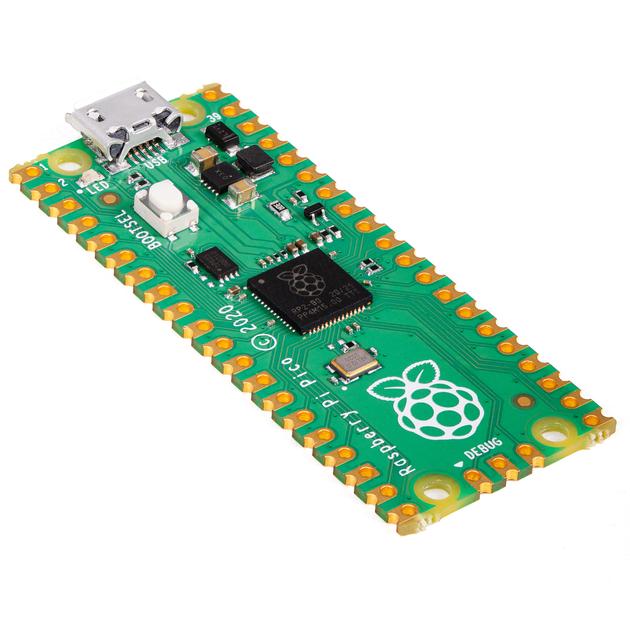
Finally, the Raspberry Pi Foundation released a new board! The Rasberry Pi Pico! Their first microcontroller!
I haven’t had much need for advanced microcontrollers like these, a regular Arduino is plenty for the little hobby projects I work on, but for $5, I’m definitely going to see if I can swap these in at some point.
This year I resolve to blog once a week again. Every Friday I will post what I’m working on. I’ve become creative again (I think…) and I want to put out to the world what I’m working on.
Raspberry Pi StepMania Dance Pad
Right now I’m working on a CNC’d StepMania dance pad for the Raspberry Pi. I can’t wait to get it complete but so far we have the FSR’s working with the Arduino connected to the Pi.
LEGO
I’ve been building a few LEGO sets with my toddler these past few months. Mainly I build them and he does QA I should say 🙂 It’s so much fun watching him get better and better at putting stuff together. I love it!
3D Printing
Last print of 2020 was of course a Bulbasaur. My favorite starter Pokémon!
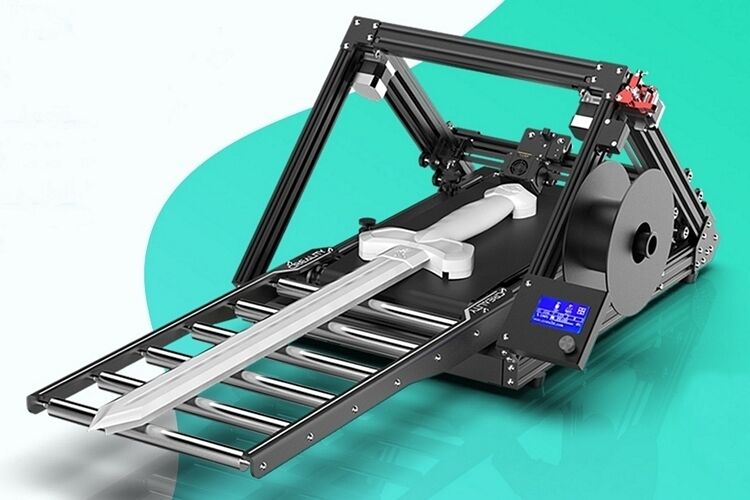
I backed Naomi Wu’s 3D PrintMill “infinite Z” printer on Kickstarter which should hopefully arrive in a few months. I know how many 3D printers have failed on Kickstarter before, but this is a collaboration between Naomi and Creality, and they already have the printer built, this is more of a way to how many they need to make for their factory. And I get that. It’s a great use of Kickstarter. I’m excited to buy vast amounts of filament for this thing!
That’s it from me for this week. Here’s to an amazing 2021!
So, like my last post stated, I did some things while stuck at home.
My absolute favorite project was this:
I followed this guide (https://github.com/geaz/simplyRetro-D8) and built this awesome 3D printable desktop arcade cabinet. It of course uses a Raspberry Pi running RetroPi and uses an awesome readily available 4 x 3 LCD screen!
And of course my little guy helping me build and test it 😀
I got a small CNC machine in January and hadn’t had time to use it until recently but I have been having fun making some videos of it in action.
That’s a 3040T CNC Machine. You can find a lot of them on eBay and various other importing sites. More fun hobbies that involve turning one thing into another thing 🙂
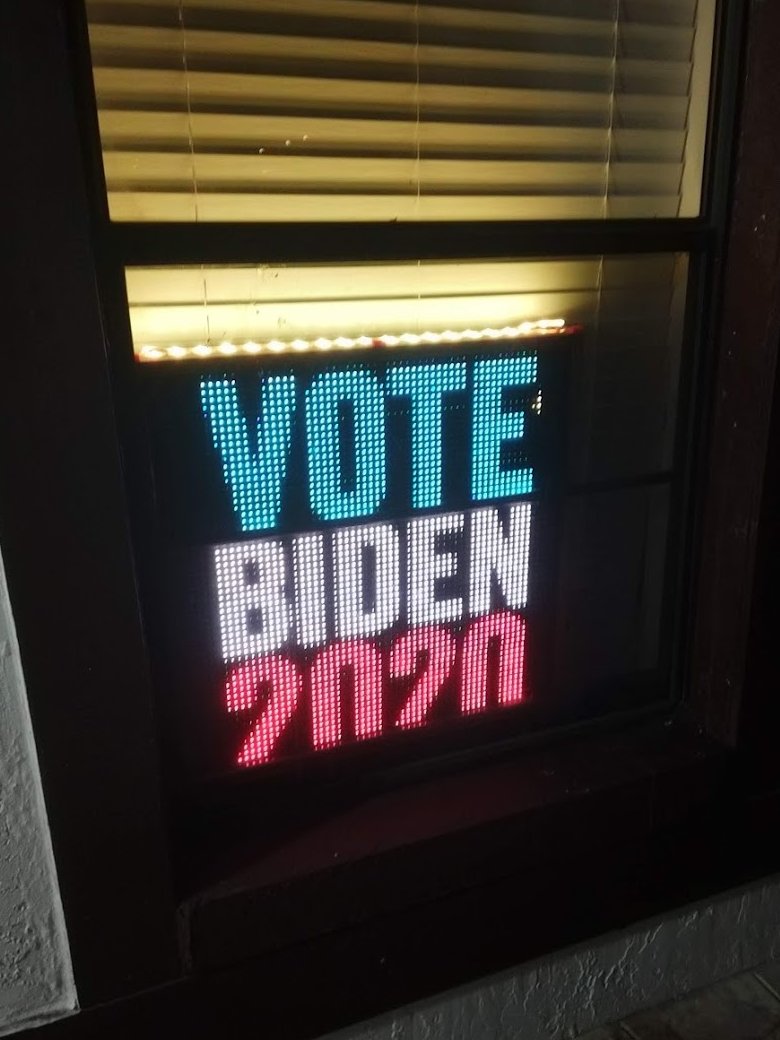
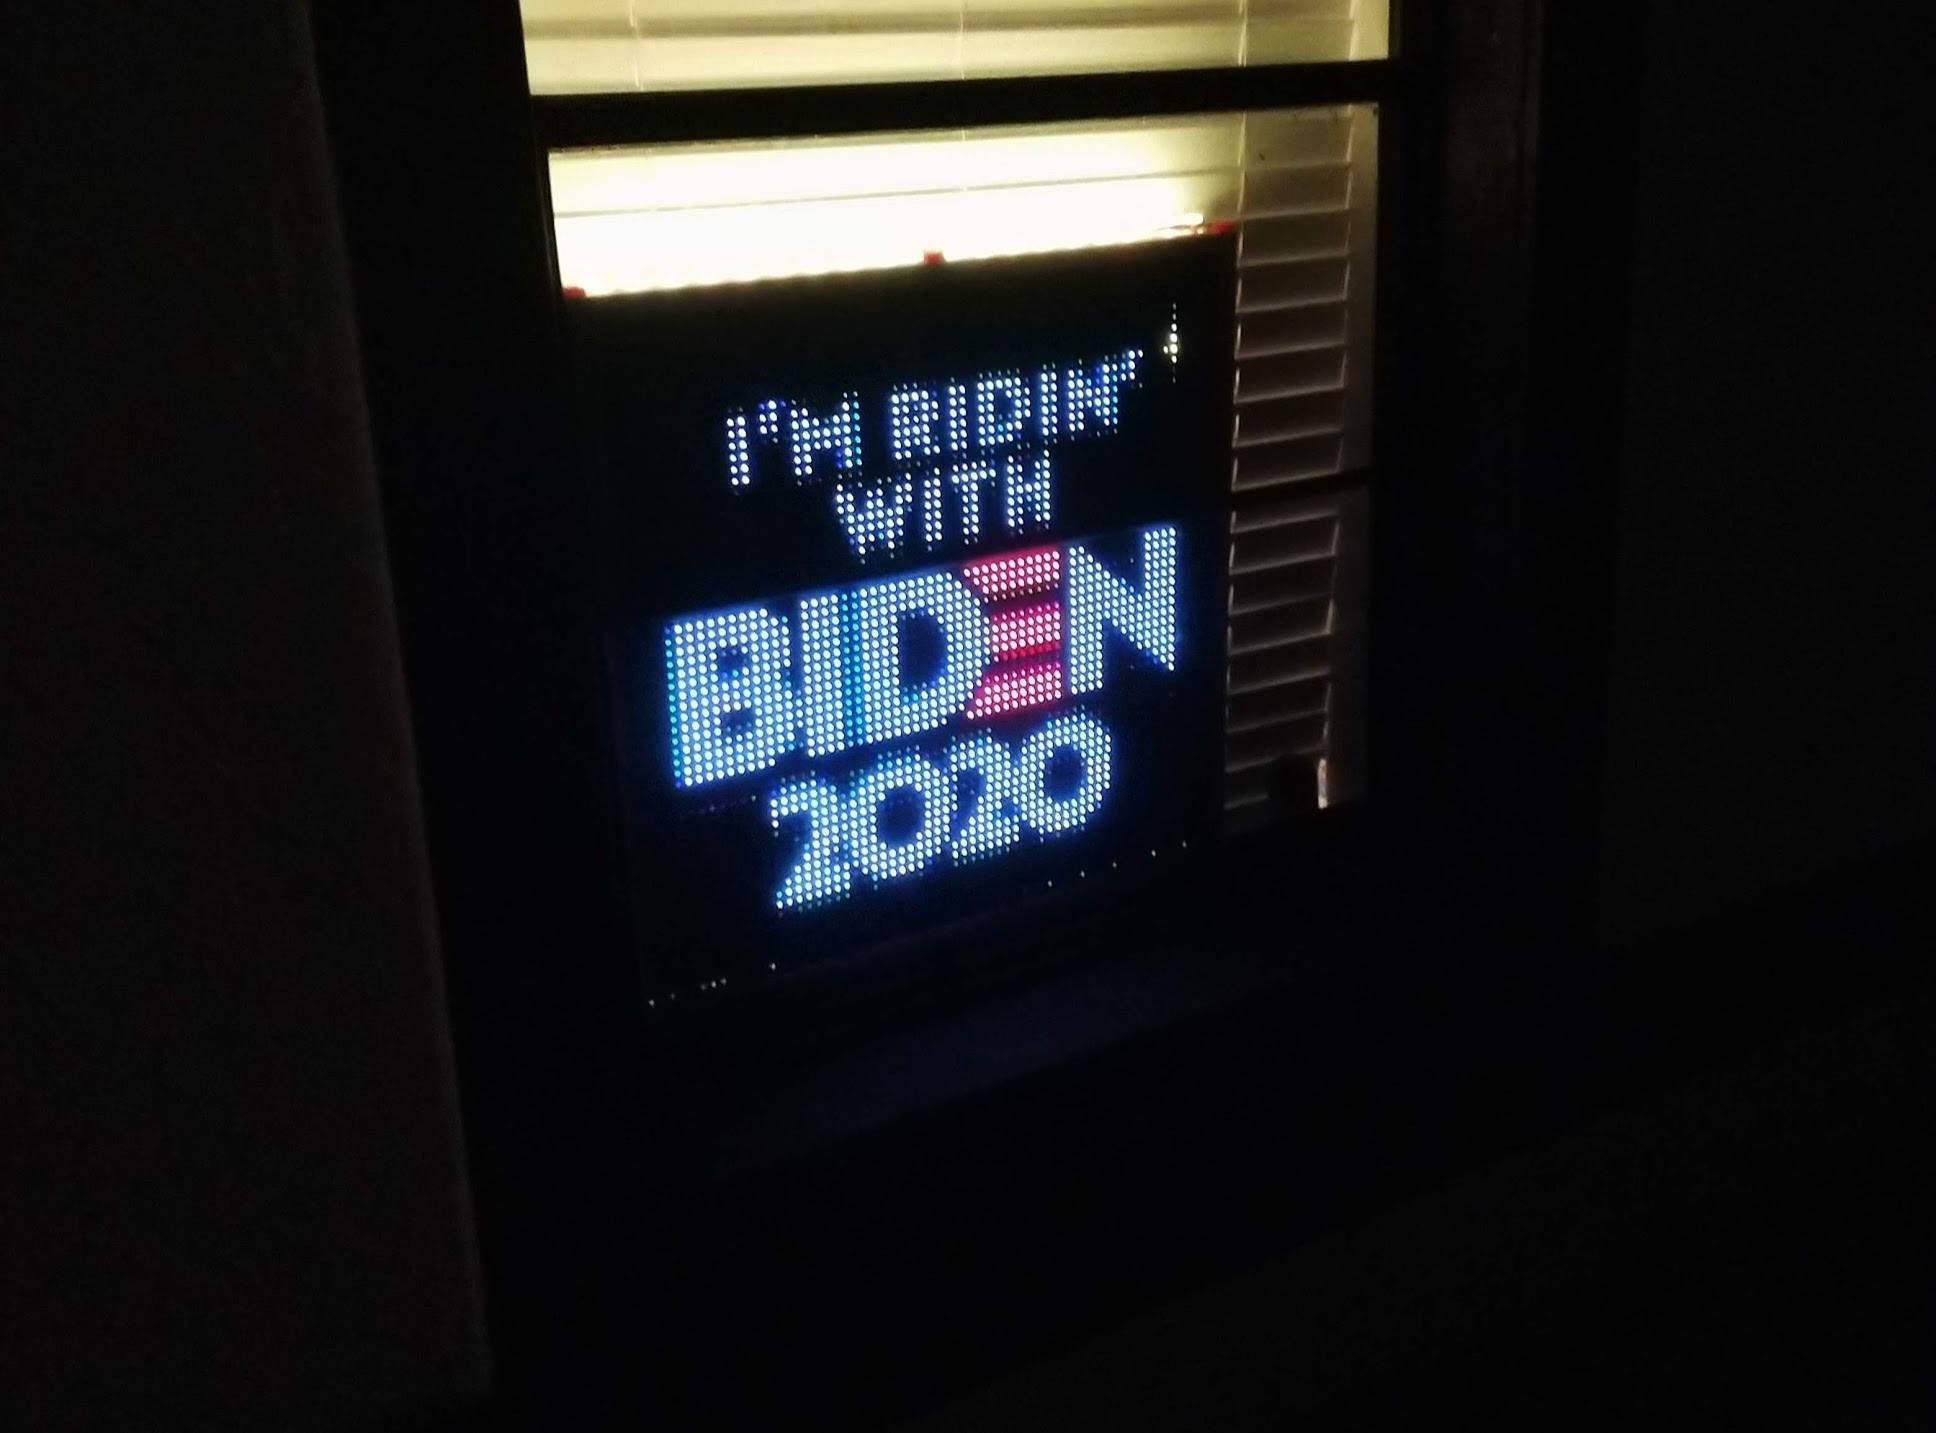
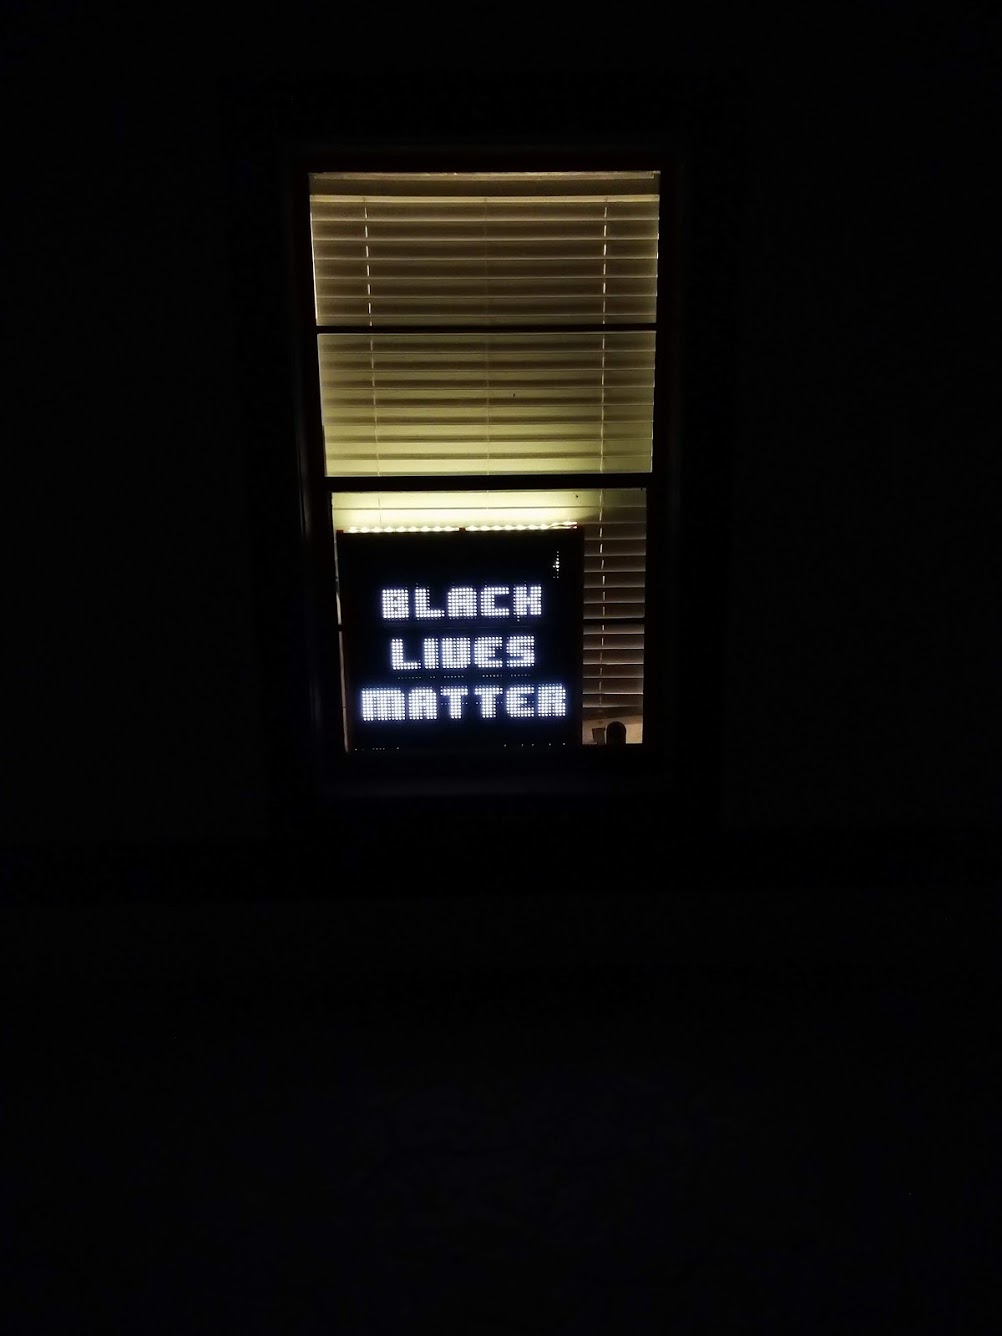
On that note, I repurposed my 4k LED display for a lot of statements this year!
My house got egged for one of those statements. Worth it.
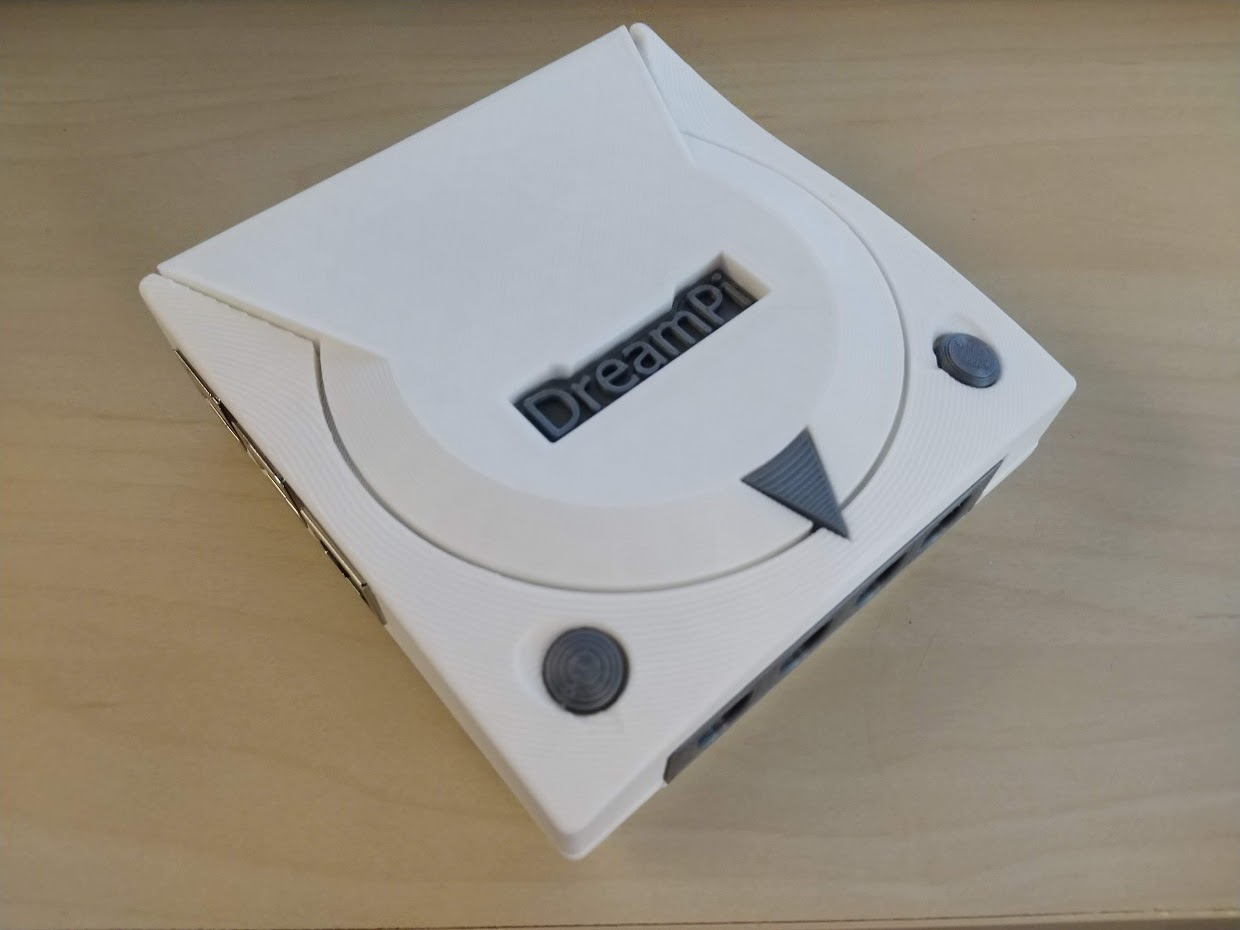
I edited and 3D Printed a mini Dreamcast case for the Raspberry Pi! Did you know you can play Dreamcast games at 60FPS on the Pi4 now? No? WELL YOU CAN! Using Redream it’s totally possible! You can download the case files here https://thingiverse.com/thing:4539273.
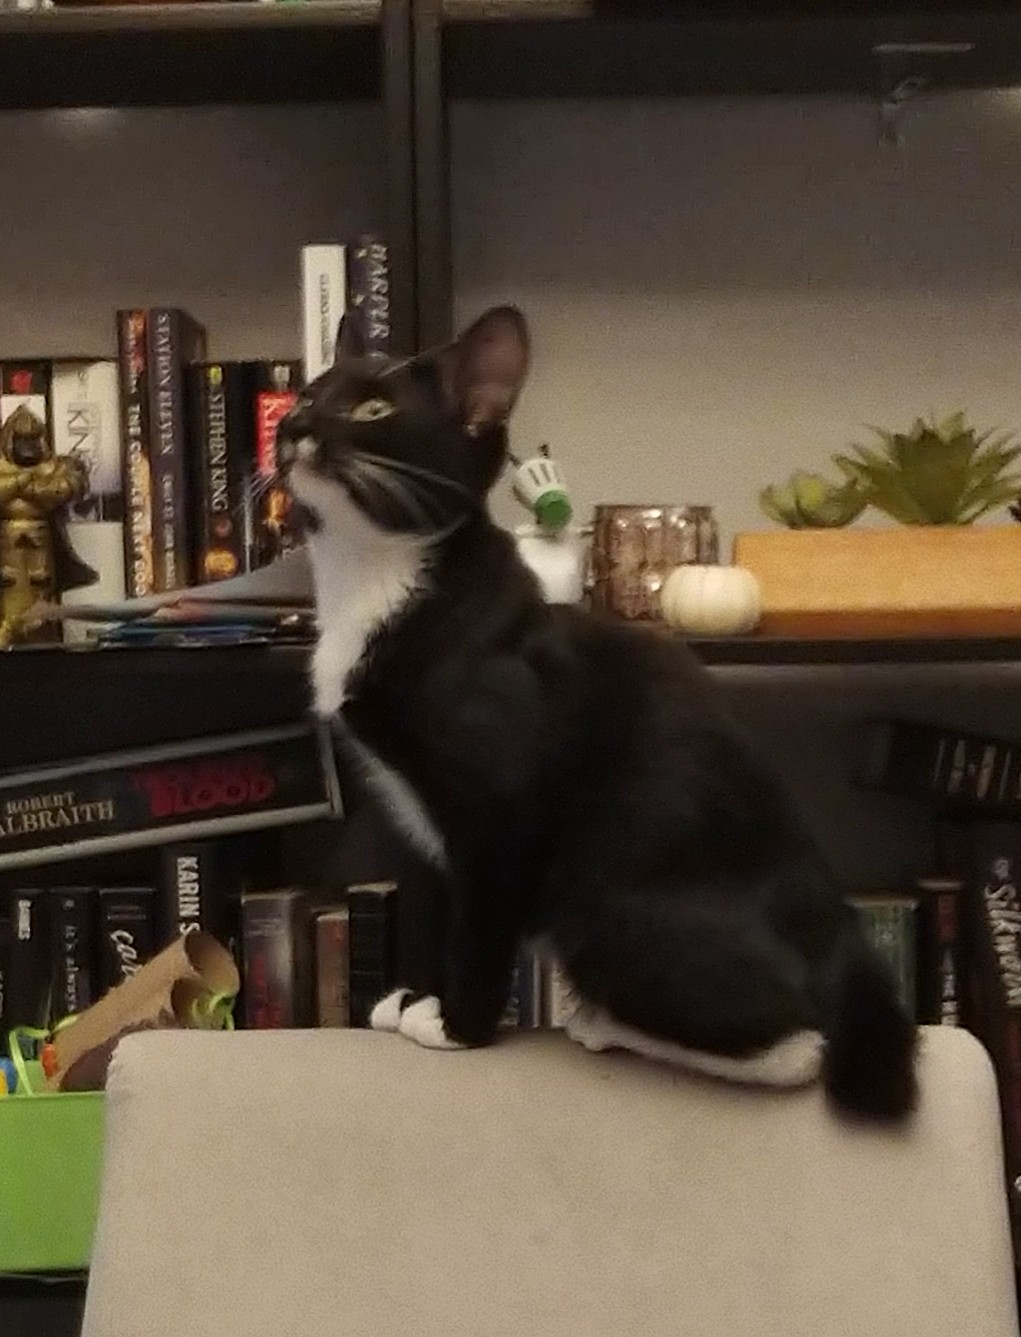
And we got a new kitten!
Say hi to Dash. Our Manx kitty. He’s kinda awesome.
If you’ve gotten to this part of the post, all I can say is thank you! It’s been a year. Please stay safe out there. Wear a mask. Keep on making. I’ve missed y’all!
I almost didn’t blog for the whole year. To be truthful, it’s been hard to write this past year. Lots of amazing wonderful things have happened to me in 2018, but I’m exhausted. And this blog was easy to overlook. I want to write again, but at my own pace. I’m going to try to start again.
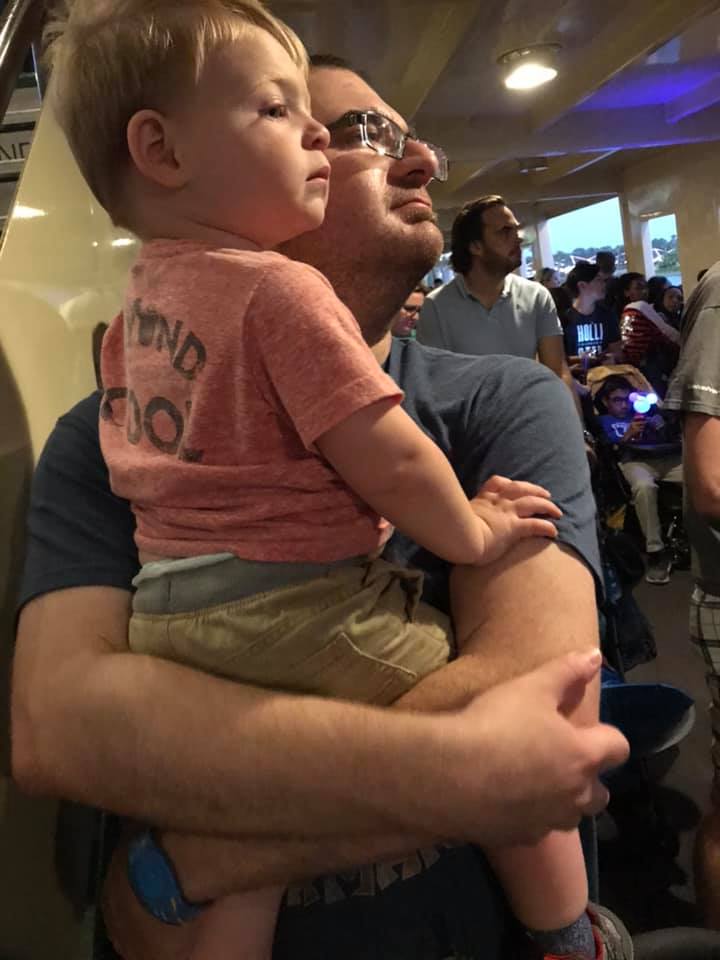
That said…. BEING A FATHER IS AWESOME! I have an amazing little mini me who is 20 months old and is just so much fun. He has made me grow in ways I never even knew imaginable.
Maker Faire Orlando 2018
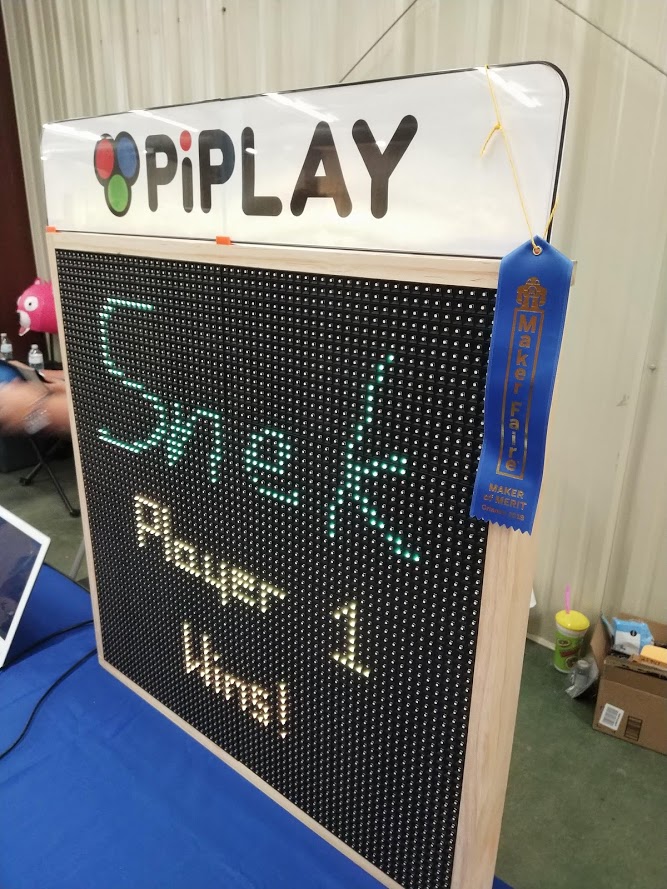
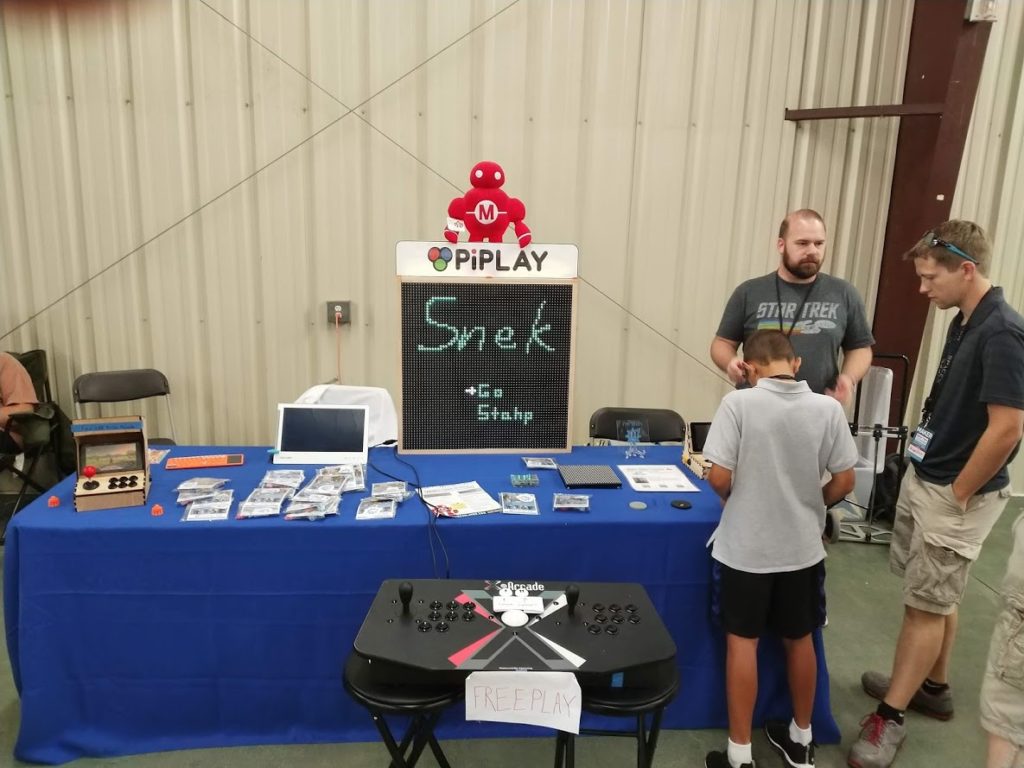
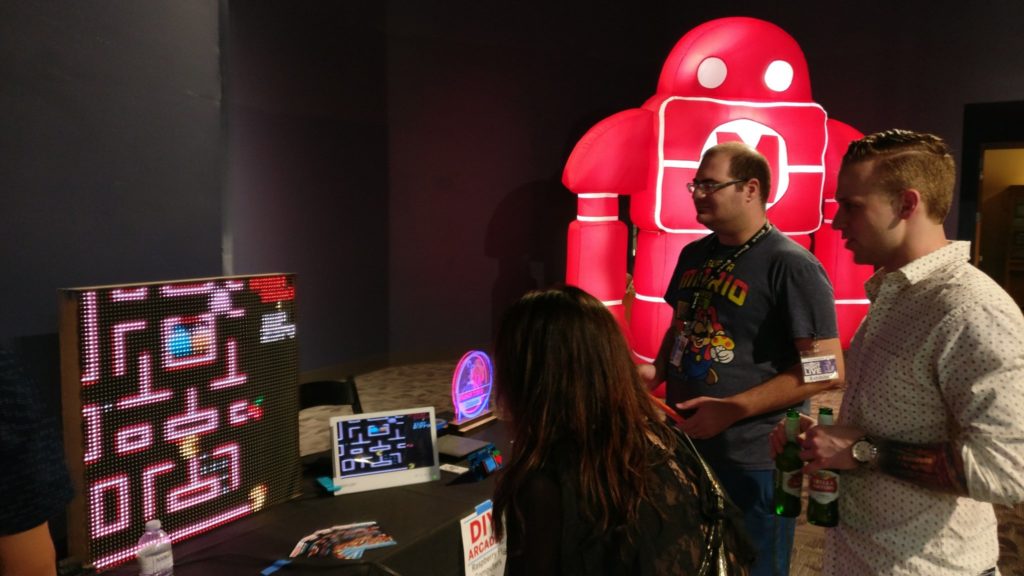
My friend Jacob and I worked on an awesome project for Maker Faire Orlando this year, and I am so proud to say we won Maker of Merit! It is a deep honor to me to win that award. And of course it’s Raspberry Pi related 😀
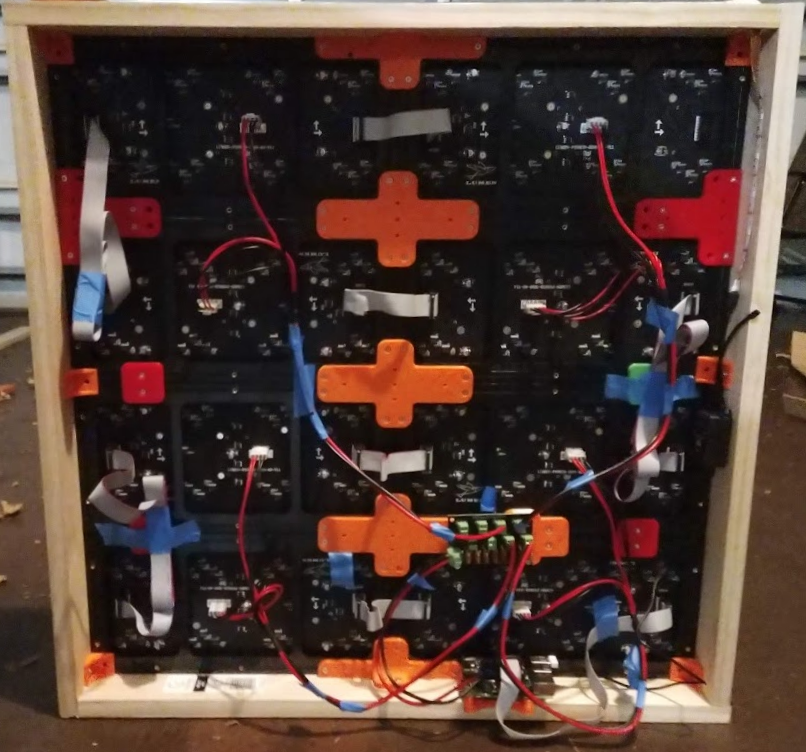
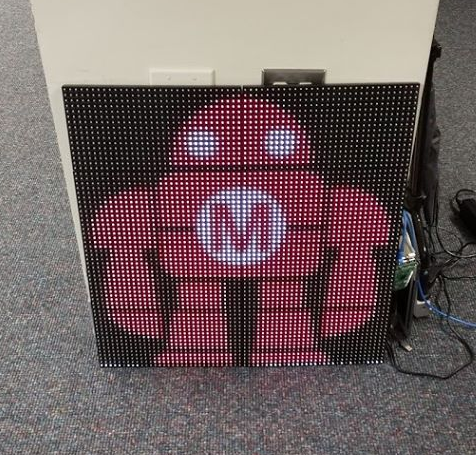
We made a 4096 LED pixel framebuffer display powered by the Raspberry Pi!
LED Display playing a clone of SnakePrototype at the Orlando Science Center
How it works?
We are using P10 LED panels as the basis for the screen. P10 means a 10mm dot pitch, so 10mm between each LED. They range from 3 – 10mm. The panels also usually come in a size of 16 x 32, but luckily they are daisy chainable!
The Raspberry Pi can even handle upto 32 of them in 3 chains! For our purposes we only used 8 16×32 panels in one chain.
8 P10 Panels, daisychained to an Adafruit LED matrix bonnet, connected to a Raspberry Pi 3b+, with power distributed via a CFOL Distro 8 board.
The above picture may look complicated, but it’s not that bad.
8 P10 panels are daisy chained together using a standard HUB75 cable (it’s like an smaller IDE cable).
The panels are mounted together with the orange and red 3D printed brackets.
The first panel is connected to a Raspberry Pi 3B+ via an Adafruit LED matrix bonnet.
The power for the panels and the Pi comes from a 10amp DC supply, which plugs into the bonnet. The bonnet powers the Pi, and has two screw terminals for the voltage output. The +/- screw terminals connect to a CFOL Distro 8 PCB (in the center of the board) which takes the input and breaks it out to 8 screw terminals. We only need 4 since each cable powers two panels, but it gives us room to expand.
TL;DR: IMHO 3 point bed leveling is so much better than 4 point bed leveling and auto bed leveling.
So the PiPlay Portable Kickstarter has ended, and we have been doing tons of fulfillment these past few weeks. One of the add-ons was originally a laser cut case, but realistically, it didn’t work well.
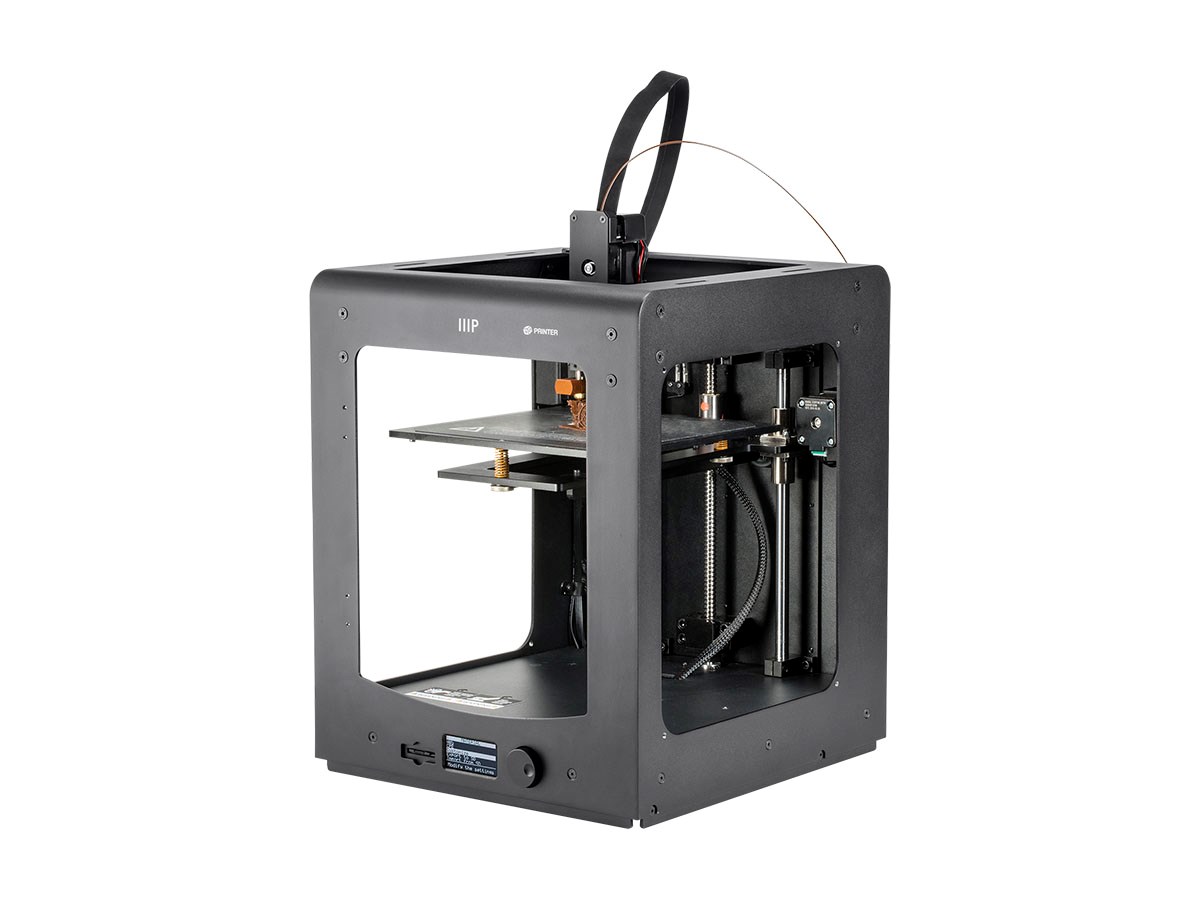
My friend Nick from P3DCreations was able to design us an awesome 3D printable case at the last minute, and the demand for it was high. Higher than I could reasonably print on my current printers. 3D printing is a lot slower than laser cutting, so I needed to add a new printer to my “print farm”.
The Monoprice Maker Ultimate is a rebrand of the Wanhao D6 (or Duplicator 6) which itself is a mix of an Ultimaker and a Zortrax M200. I have been printing with it non stop for the past 2 weeks and it has been a workhorse. I love this printer. It has made 3D printing fun for me again. Pro Tip: Wait for it to go on sale, as I got mine for $550 shipped.
Leveling Up
The difference comes from how you level the bed. The most common bed is a piece of aluminum with 4 screws attached at each corner. As you screw down each corner, you are bending the bed, trying to make it flat enough for your print to adhere correctly at all points. Realistically you end up warping the bed. Every time you get one point leveled, you’ve just unleveled the opposite point.
Auto bed leveling uses a probe and triggers when it detects the bed. It does this at multiple points on the bed at the beginning of each print to determine the shape and warpness of the bed, and then tries to correct the skew as it prints. When it works it’s amazing, but if it doesn’t you risk damaging your bed, hotend, and printer components. Also, depending on the controller board and software determines how well the software can compensate.
On the Maker Ultimate (and numerous other printers) the bed is leveled by 3 screws. One in the front and 2 in the back. Doing this makes a plane and makes leveling a quick affair that just works and tends to stay in place for longer.
I also like that the bed is stationary and just moves on the Z axis, rather than i3 type 3d printers that moves the bed on the Y axis. I’m not a fan of how much motion is generated when moving the bed like that. I’ve had failures due to the wobble of the bed causing a print to fall off.
There are many great i3 printers, and a well tuned printer will make good prints on any machine, but man, I’m so pleased with this Monoprice Maker Ultimate.
This has been an exciting week. The PiPlay Portable is fully funded, and we have less than 12 hours to go on the Kickstarter!
Sam has been growing so fast! I love being a Dad. It’s an experience I am so happy I get to have, and of course I have 3D scanned him and got him 3D printed…
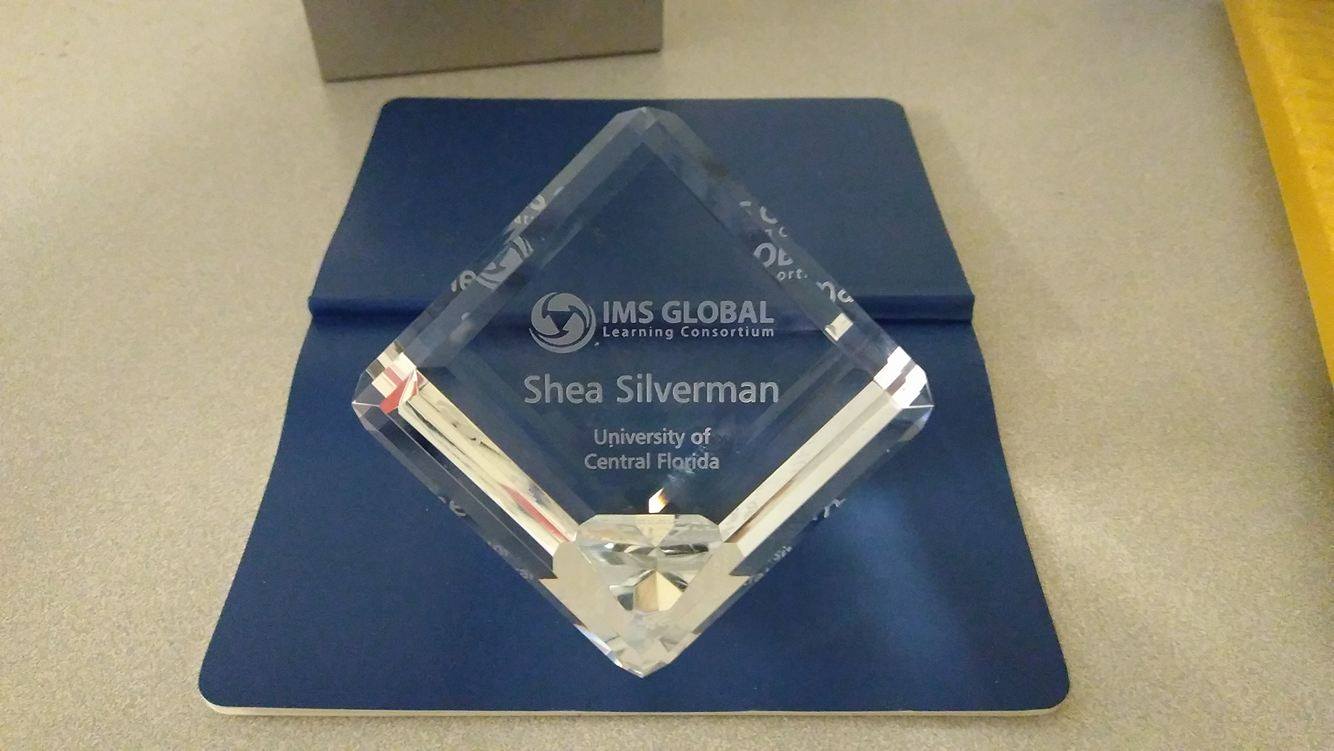
I also won the Community Leadership award from IMS Global at the LILI conference. I had no idea I was even nominated!! I am really humbled by this. Thank you IMS!
Not much to report on this week. I was having issues with really bad stringing on my prints from my SeeMeCNC ERIS 3D printer. On fully enclosed prints, it’s been great, but on anything with overhangs or open spaces, the stringing has been incredibly bad.
I use Simplify3D as my slicer, and it’s been worth every penny. This past week I get fed up with making the adjustments myself, so I emailed Simplify my settings file, pictures of the issues, and within a day they sent me back a new settings file, for a printer they don’t even officially support, and it’s now working 100% better.
Prints are more dimensionally accurate and I have almost zero stringing!
CURA and Slic3r are really good free open source slicers, but it’s been totally worthwhile to pay for Simplify!
I also bought ANOTHER new 3D Printer, which should arrive in a week or two, and I’m excited to see it in action. I will be doing a review of it so be on the look out!