Dec 31

Raspberry Pi Powered SNES

Hey All,

HAPPY NEW YEAR!  This is what I assume to be the last post of 2012.  Might as well end it with a bang 🙂

A fellow member of FamiLAB (Orlando’s Hackerspace) has made a great write-up of his Raspberry Pi powered SNES.

I have been watching Ted (Waterbury) work on this project for the past few months, and the work is nothing short of incredible.

I hope everyone has a great new year.  May 2013 bring you joy, happiness, and success.

-Shea


Dec 14

Friday Post: PiMAME Image and other neat things

Hey All,

Hope you all like this:

PiMAME

Download Here

This is a fully configured Raspberry Pi image that auto boots into AdvanceMENU and runs your MAME games for you.  It includes a copy of a Free MAME ROM so you can see it working right from the start.  SSH is already enabled, memory split is setup, and everything is updated.

Once you have it flashed to your SD Card, I recommend running “sudo raspi-config” and expanding the file system, otherwise you will only have a few megs of space left to use.

Please let me know if you have any questions, comments, or suggestions!

Raspberry Pi Radio

http://www.icrobotics.co.uk/wiki/index.php/Turning_the_Raspberry_Pi_Into_an_FM_Transmitter

With one wire and a simple program, you can turn your Raspberry Pi into an FM Transmitter that plays on FM 100.0MHz.


Sep 07

Raspberry Pi SD Card Corruption

Hey All,

So this week started off cool then took a turn for suckage.  I’ve been working on getting two more emulators working.  One is a Neo Geo Pocket Color emulator, and it works, but has some minor issues.  The other is another mass emulator like MESS.  The older version compiles, but the latest one errors out.

The reason I am not posting binaries at the moment is because my SD card’s filesystem got corrupted during a test I was doing, and won’t boot.  I’ve made a bit for bit backup of the card using DD, and I’m going to try and retrieve as much data from it as possible.  Luckily I have other SD cards to use.

I was hoping to have the binaries for NeoPop available tonight but I have to recompile them on the new SD card.  If you want you can click the link above and download the source and compile it yourself.

The other emulator I’ve been working on compiling is called Mednafen.  The old version (0.8) is available in Raspbian repos, so just do sudo apt-get install mednafen and you should be good to go.   Make sure you run it once, then edit the ./mednafen/mednafen.rc file.  There is a part that says video and it tries to use opengl, set it to SDL and you should be good to go.

Have a great weekend everyone!

Sep 01

Friday Post: Arduino Keyboard Joystick

Hey all,

It’s been a long week, and I am really glad I have a long weekend to sleep in.

When the Arduino Leonardo was announced I was really excited to see it have built in USB HID support and could act as a keyboard, mouse, or joystick.  I was even more excited to find out that my year old Teensy++ (Arduino compatible board) was based on the same chipset that the Leonardo now uses, and is able to act as a keyboard as well!

This is a new feature that was introduced in the Arduino 1.0 IDE.  You can now send keyboard presses with this simple line of code: Keyboard.write(‘a’);  If I wanted the Up joystick to be the up arrow on the keyboard, I would just use: Keyboard.write(0x0E); .

.

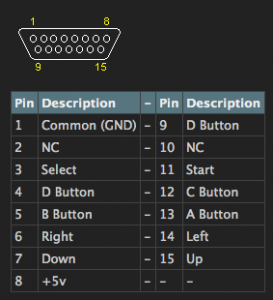
My goal is to use my Neo Geo AES controllers as an input for MAME.  The Neo Geo pads don’t have any control boards built into the unit.  The console itself interprets each pin individually, just like an actual arcade board.  The pad uses a standard midi gameport (DA-15) connector, with each pin representing one button.

My idea is to make a Neo Geo pad to usb adapter using the Teensy++ as go-between.  The Neo Geo pins will be wired up to the digital pins on the Teensy, and the Teensy Arduino sketch will interpret each button press as a keyboard press.
I’m looking forward to working on this project.  I hope everyone has a great weekend and a restful Labor Day.

Aug 16

Made the frontpage!

I was very excited when I found out that on Monday, I made the frontpage of the Raspberry Pi website.  A big shout out to Liz for mentioning me and linking back here.  It made my day!

I really love working on this little computer.  I’m learning so much and using skills that I took for granted.  It’s really pushing some of the boundaries I had setup against myself.  I’m glad to be getting past them.

I’m also thinking of getting one of these and building a RaspberryPi bartop machine:

Aug 10

Friday Post: Descent and photography

Hey all,

Another Friday post here.  A couple of days ago Derhass made a post about getting Descent 1 and 2 ported to the Raspberry Pi with OpenGL ES.  Descent was an amazing game released back in the early 1990’s.  It had true 6 range freedom of movement in a spaceship with 3D modeling.   An amazing game at the time, and one that I could NEVER beat.  I’m in the middle of writing a tutorial on how to patch and compile the game, as well as hosting the binaries themselves.

Today on the Raspberry Pi frontpage is a really cool piece on time lapse photography titled “Painting with light (and a Raspberry Pi)”.  The images are really fantastic:

Time lapse photography

Hope everyone has a good weekend.  I’ll be writing the tutorial up this weekend and should have it posted soon.  Thanks for the view!

-Shea


Aug 03

Friday Post: Woo! Long week…

Hey all,

This has been an interesting long week.  I’m really happy with the feedback I’ve recieved regarding the Raspbian binaries I released.  I got linked to by Adafruit which is awesome!  I purchased one of thier little 2.0″ LCD TVs.  Still waiting for it to arrive, but I plan to do some fun things with that small screen and the Raspberry Pi.  Bensoutlet.com has on sale the Motorola Lapdock for $59.99 which is a really good price.  Theres a 14 page forum post about how people are using it to make Raspberry Pi laptops.

My next goal is to write up some tips and tricks for the emulators that my commentors have posted, and still working on getting Love2D to work.

Hope everyone has a good weekend!

-Shea

Jul 23

Raspberry Pi “On/Off” Cable

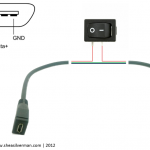
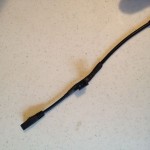
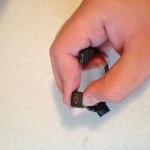
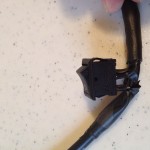
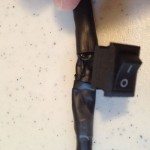
What started out as a funny thought is now reality.  I spent about an hour splicing, soldering, taping, and heat shrinking this fun little cable together.  It’s a microusb to microusb extension cable.  I split it in half, cut off the data wires, soldered the ground cable back together, wrapped electrical tape around it, then soldered each end of the Vcc wires to the power switch.  I taped them up, then tried to heat shrink as much as it as possible.

My frankenstein cable works 🙂

P.S.: All the items needed I got from Sparkfun.com (except the usb extension cable)