Jan 24

IPS LCD Upgrade for a GBA SP

Hey All,

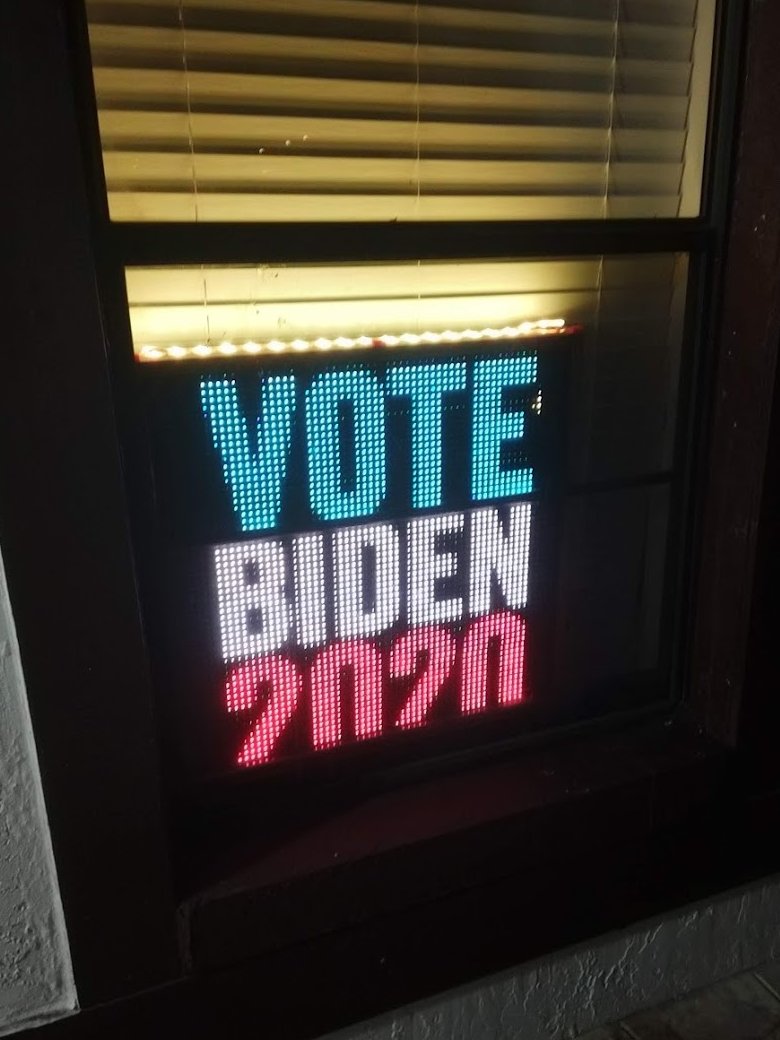
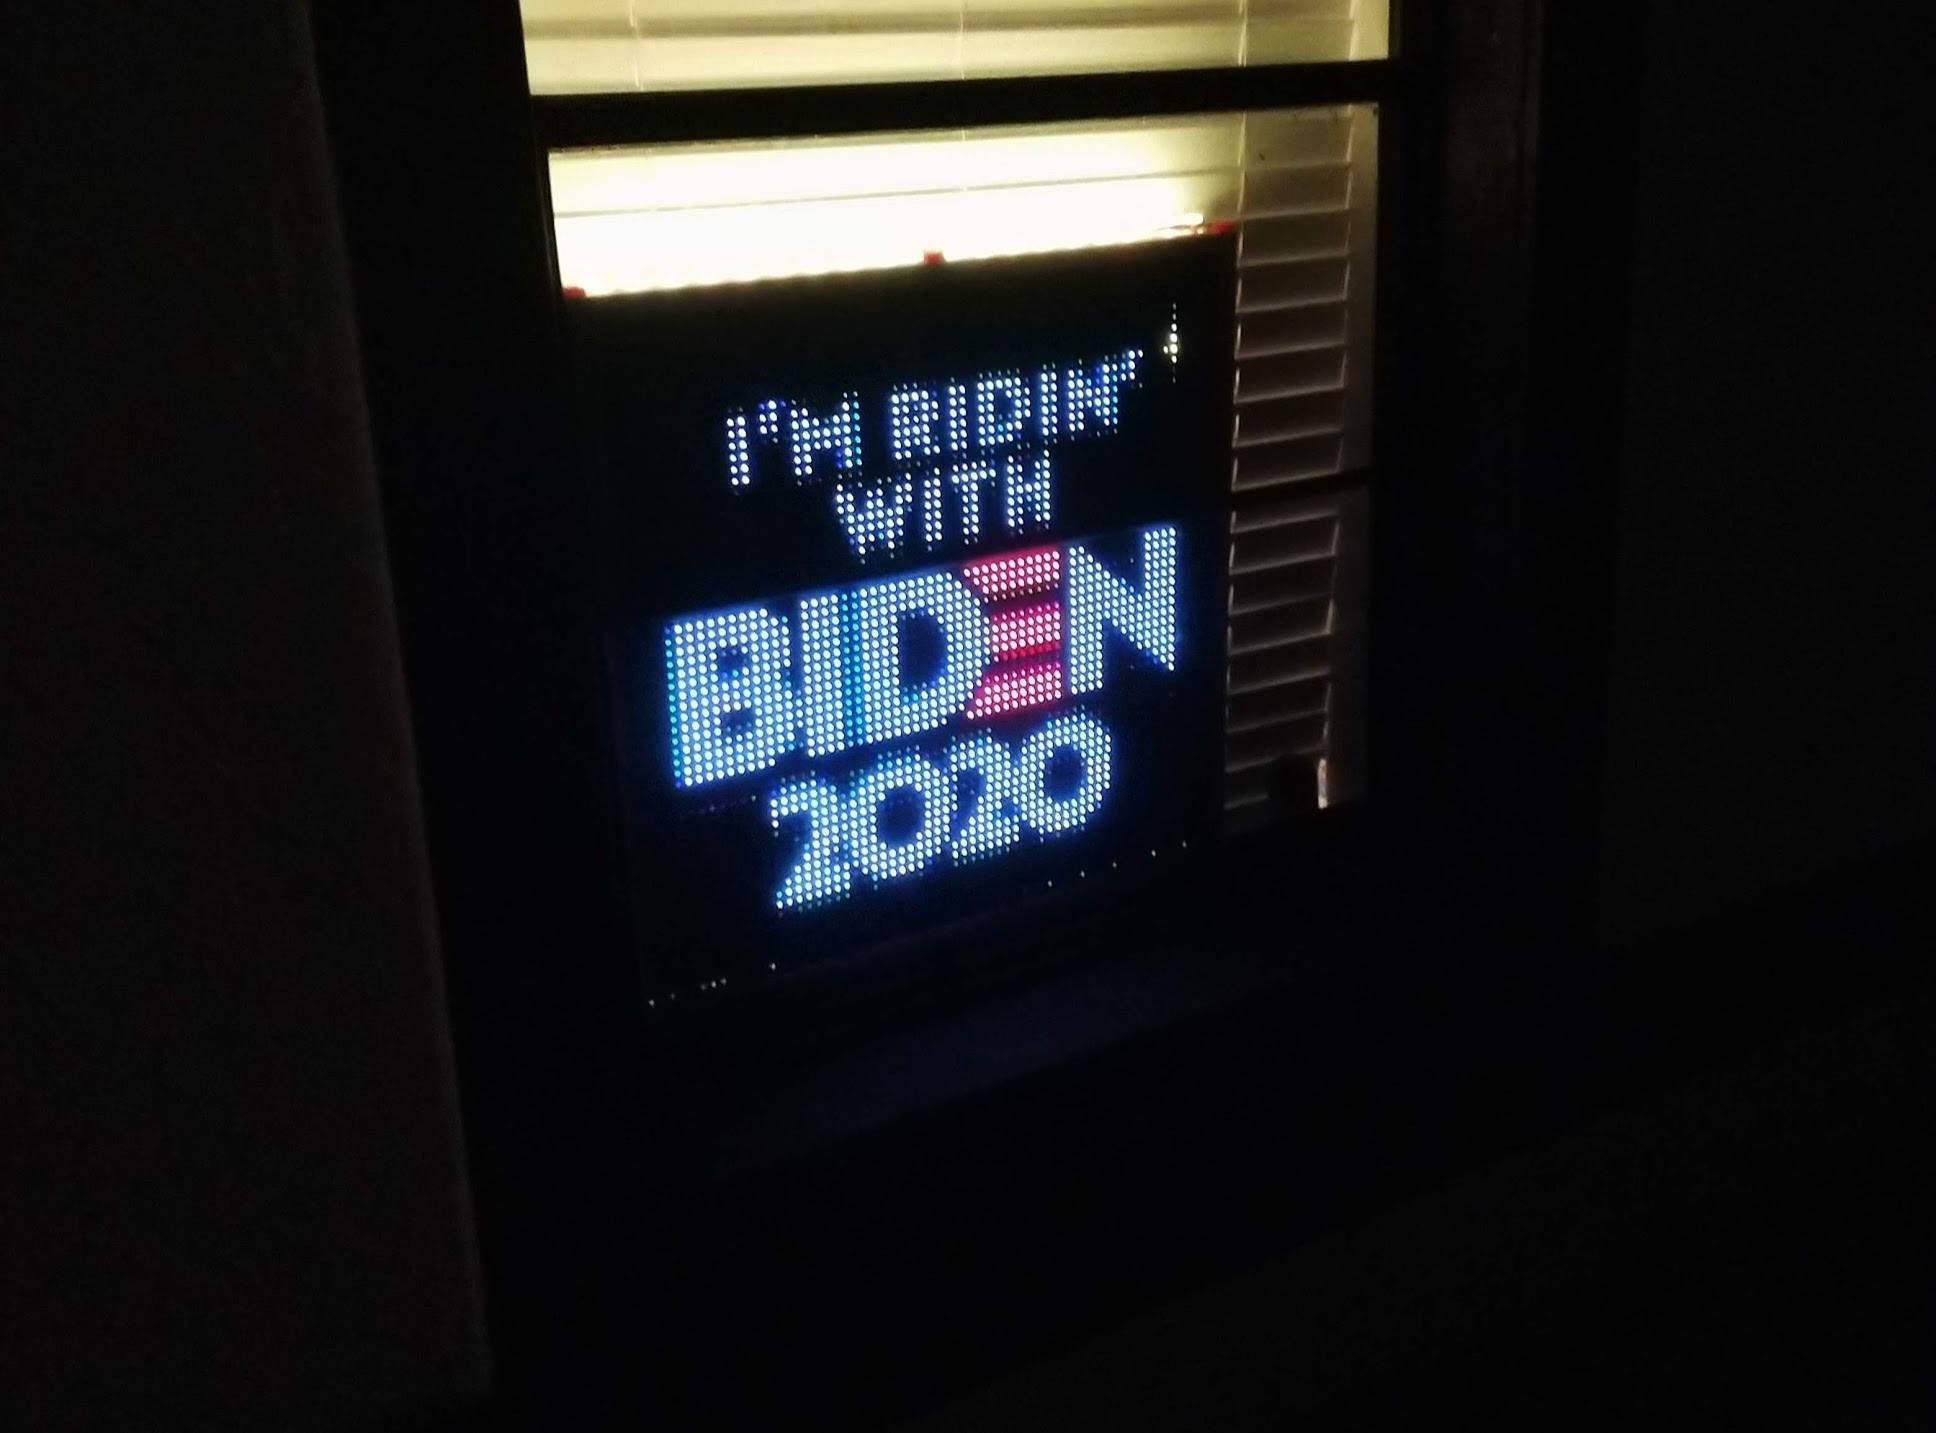
Well this has been a week! Here’s to hoping President Biden can usher in some new progressive policies and finally have a government that takes the Coronavirus Pandemic seriously. All I want is my vaccination ASAP!

Tryign to take my mind off everythign I’ve been throwing myself into lots of projects that I KNOW I can complete. One of those was to upgrade one of my older GBA SP AGS-001 consoles with an awesome IPS LCD screen.

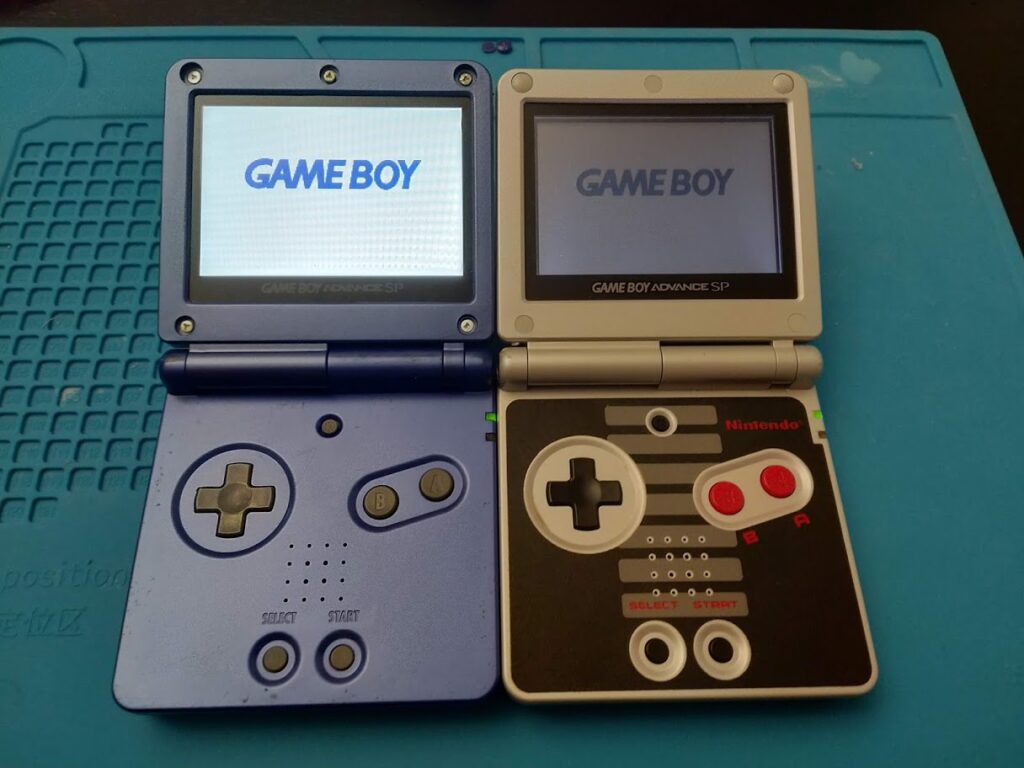
The difference between the original frontlit screen versus the new one is night and day!

This is a time-lapse of me refurbishing and upgrading a beat up original Japanese imported GameBoy Advance that used a front-lit screen.

I take it apart, clean it all out, then replace the screen with a back-lit IPS LCD and new casing for the screen.

The actual hardware swap took less than an hour including soldering the LCD brightness control wire and then me messing up and forgetting to put in the hinge locking screw the first time around.

The screen (and new cases) are easily found on eBay – https://www.ebay.com/itm/V2-IPS-GBA-SP-Backlight-Backlit-LCD-For-Game-Boy-Advance-SP-Pre-cut-Shell-Case/184107831403 – That’s the one I used!

I also found some awesome shiny “silk” green PLA filament and printed this giant Bulbasaur!

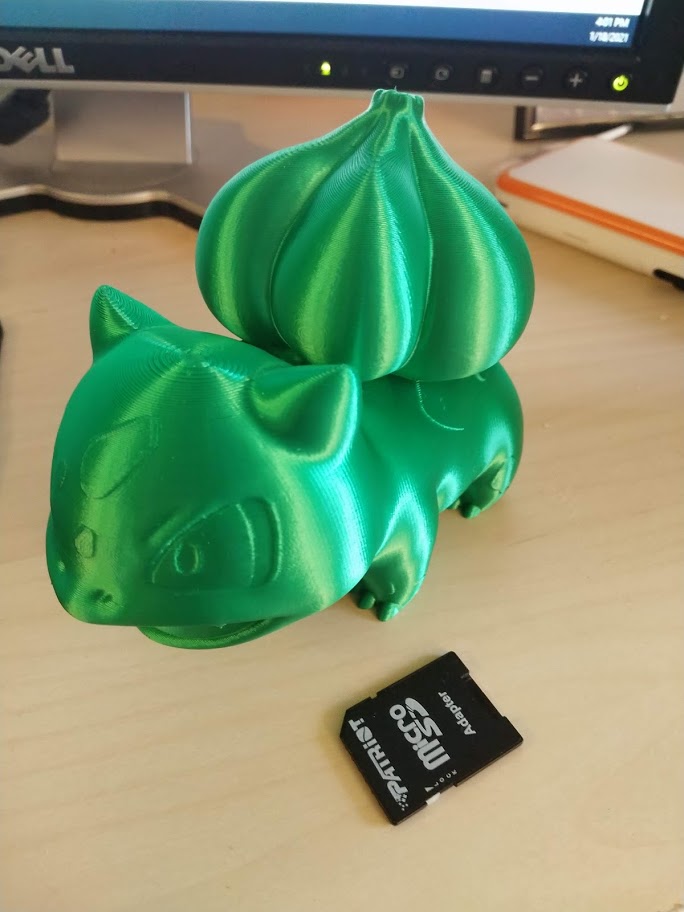
It came out so great!

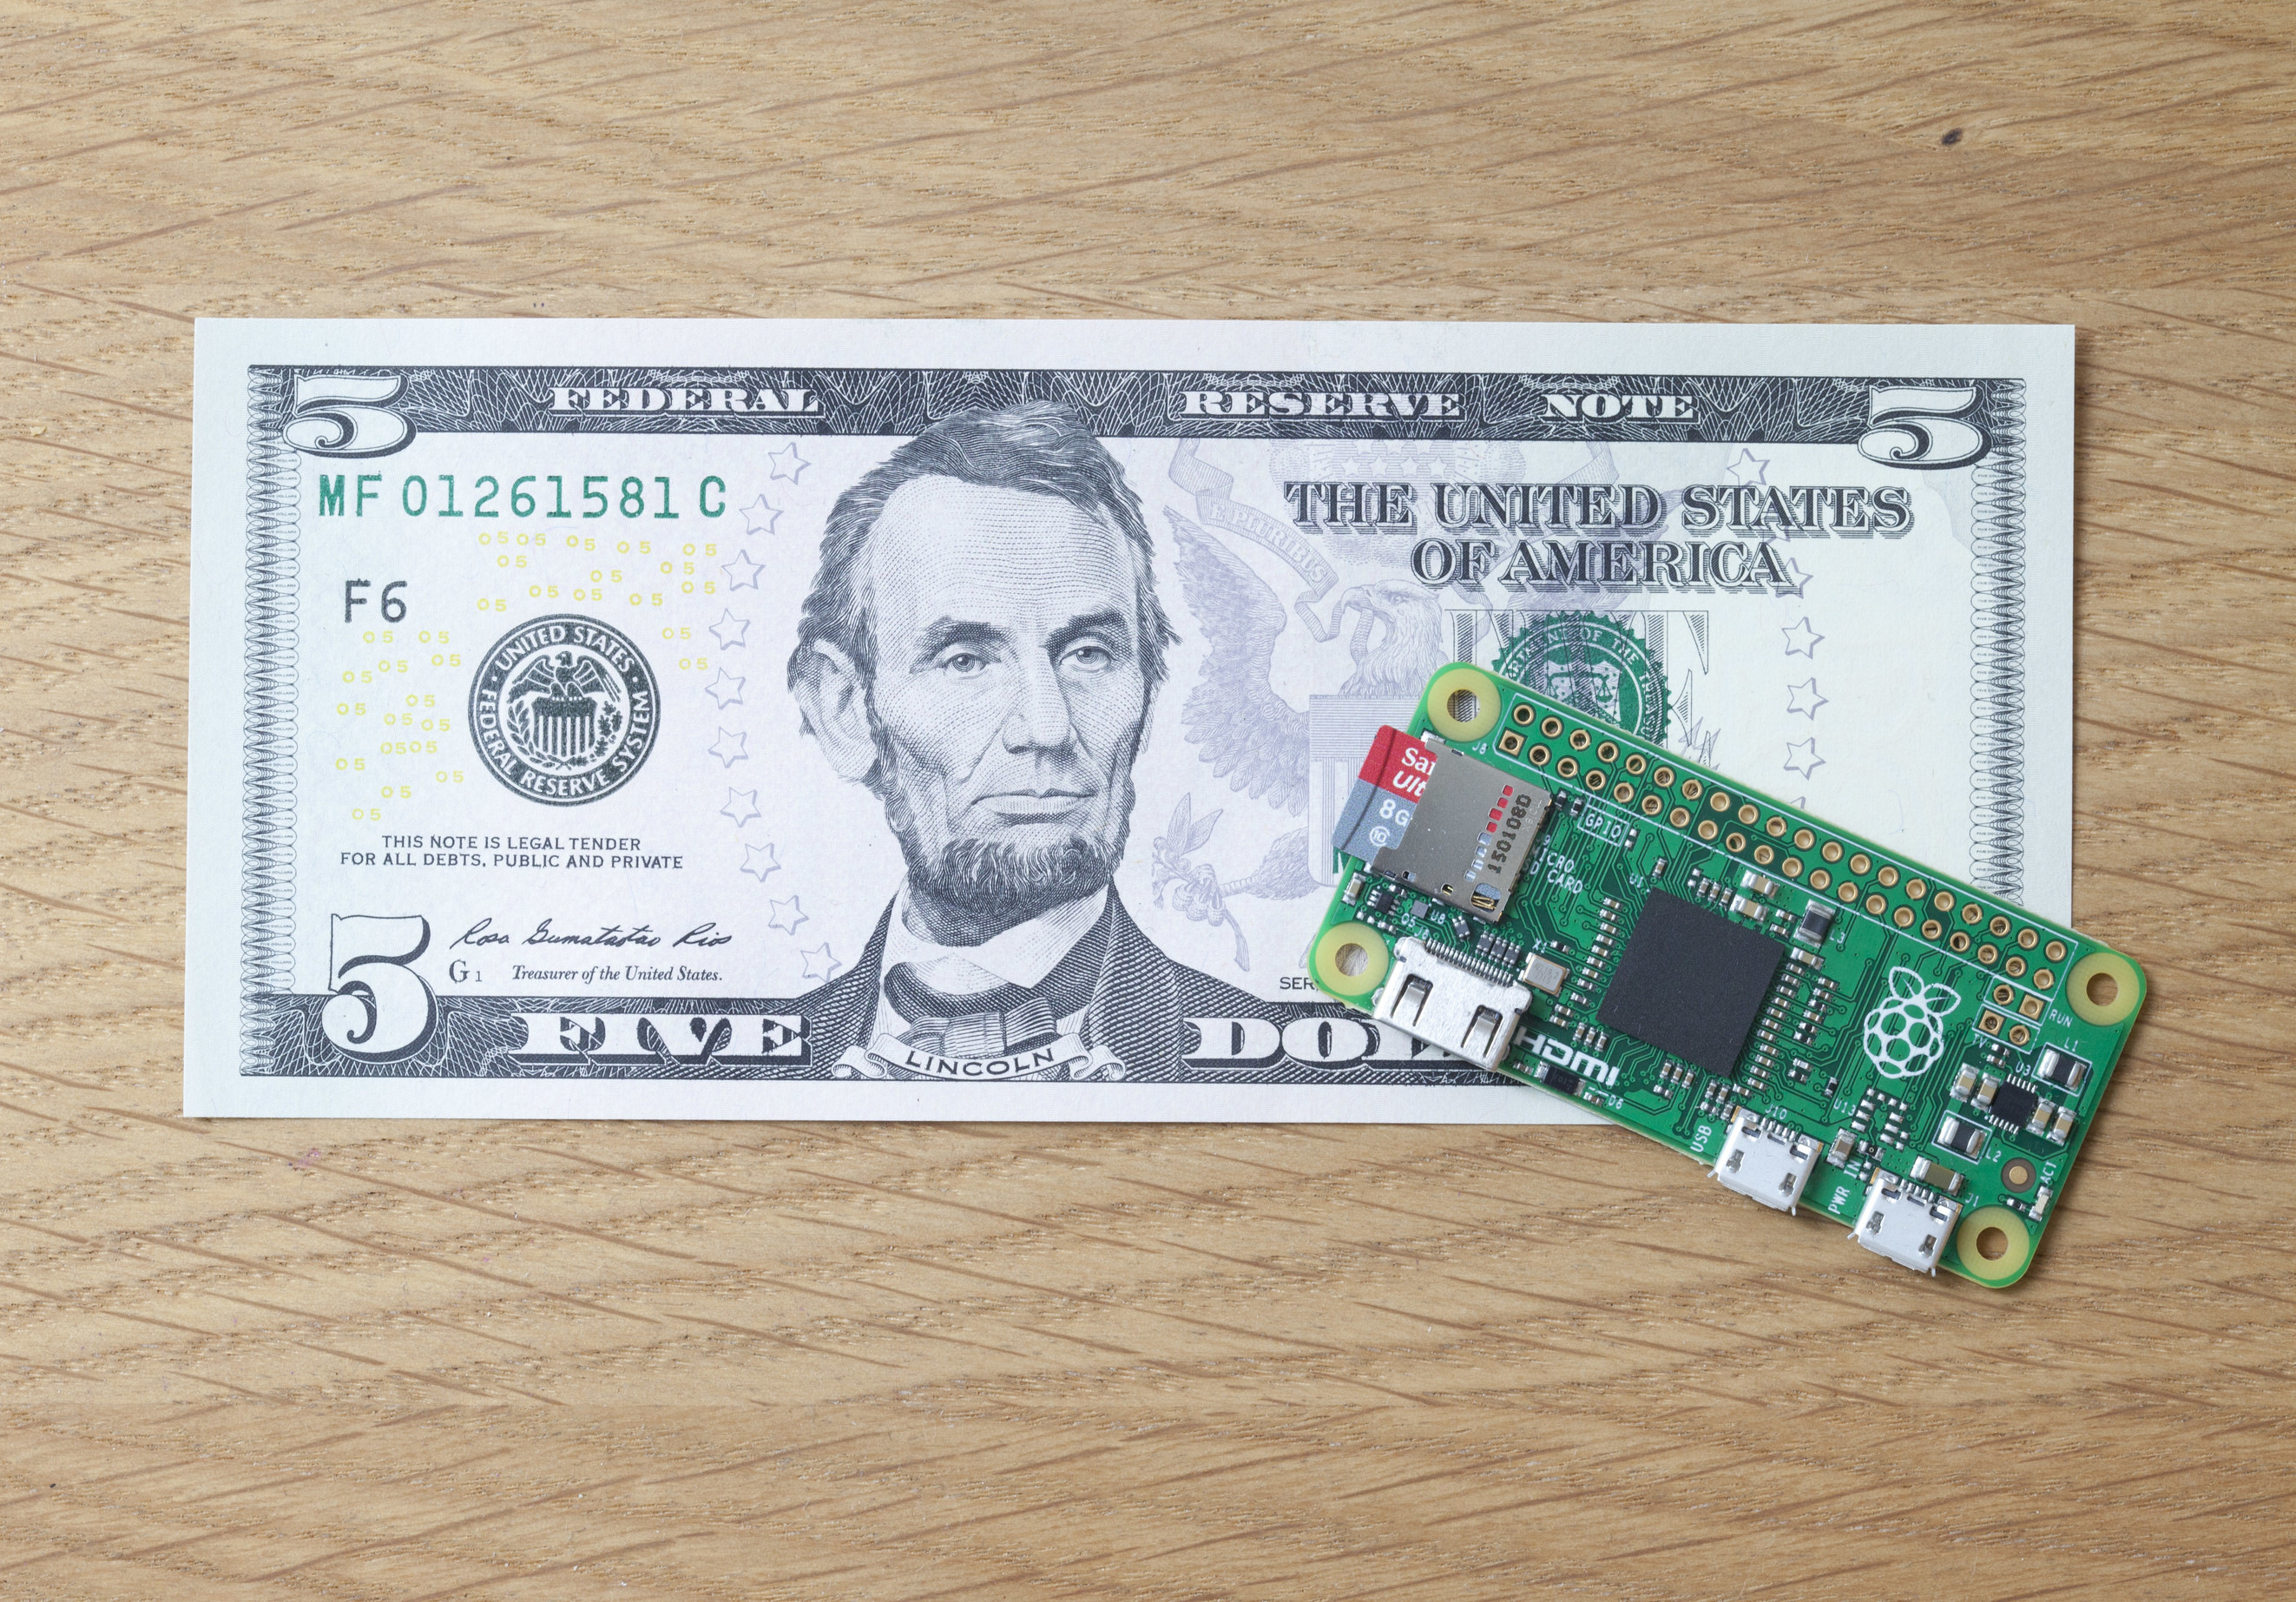
Finally, the Raspberry Pi Foundation released a new board! The Rasberry Pi Pico! Their first microcontroller!

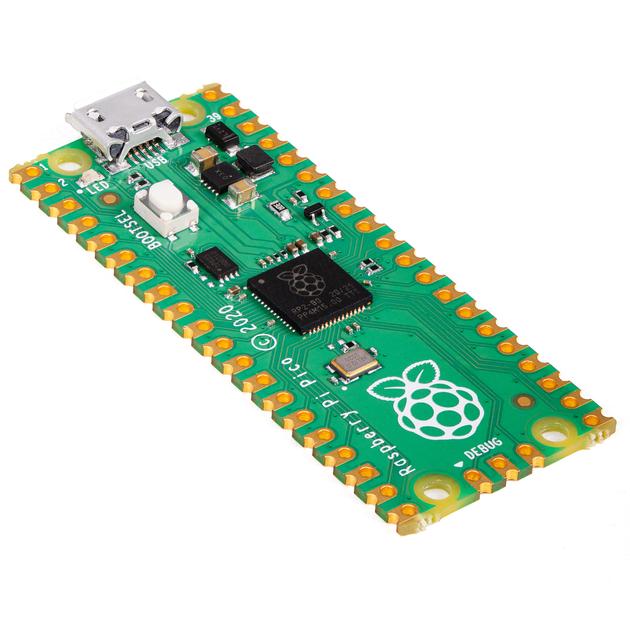
I haven’t had much need for advanced microcontrollers like these, a regular Arduino is plenty for the little hobby projects I work on, but for $5, I’m definitely going to see if I can swap these in at some point.

Have a great week all!

Nov 17

StepMania on the Raspberry Pi 4!

For anyone that knows me, Dance Dance Revolution and StepMania were a large part of my life years ago. It’s how I lost a ton of weight.

6 years ago was my first attempt to get StepMania running on a Raspberry Pi…and it was a horrible experience.

Today I’m proud to say that StepMania runs GREAT on the Raspberry Pi 4!

I’ve hosted the shell script / step by step instructions on how to compile and run StepMania on your own Pi4 as a GitHub Gist:

Just run these commands in a terminal on the Desktop GUI version of Raspberry Pi OS and you will be up and playing StepMania in about an hour.

Enjoy!

-Shea

Nov 16

Things I did in 2020

So, like my last post stated, I did some things while stuck at home.

My absolute favorite project was this:

I followed this guide (https://github.com/geaz/simplyRetro-D8) and built this awesome 3D printable desktop arcade cabinet. It of course uses a Raspberry Pi running RetroPi and uses an awesome readily available 4 x 3 LCD screen!

And of course my little guy helping me build and test it 😀

I got a small CNC machine in January and hadn’t had time to use it until recently but I have been having fun making some videos of it in action.

That’s a 3040T CNC Machine. You can find a lot of them on eBay and various other importing sites. More fun hobbies that involve turning one thing into another thing 🙂

On that note, I repurposed my 4k LED display for a lot of statements this year!

Image
ImageImageImage

My house got egged for one of those statements. Worth it.

Image

I edited and 3D Printed a mini Dreamcast case for the Raspberry Pi! Did you know you can play Dreamcast games at 60FPS on the Pi4 now? No? WELL YOU CAN! Using Redream it’s totally possible! You can download the case files here https://thingiverse.com/thing:4539273.

And we got a new kitten!

Image

Say hi to Dash. Our Manx kitty. He’s kinda awesome.

If you’ve gotten to this part of the post, all I can say is thank you! It’s been a year. Please stay safe out there. Wear a mask. Keep on making. I’ve missed y’all!

-Shea

Dec 31

2018

Hey All,

I almost didn’t blog for the whole year. To be truthful, it’s been hard to write this past year. Lots of amazing wonderful things have happened to me in 2018, but I’m exhausted. And this blog was easy to overlook. I want to write again, but at my own pace. I’m going to try to start again.

That said…. BEING A FATHER IS AWESOME! I have an amazing little mini me who is 20 months old and is just so much fun. He has made me grow in ways I never even knew imaginable.

Maker Faire Orlando 2018

My friend Jacob and I worked on an awesome project for Maker Faire Orlando this year, and I am so proud to say we won Maker of Merit! It is a deep honor to me to win that award. And of course it’s Raspberry Pi related 😀

We made a 4096 LED pixel framebuffer display powered by the Raspberry Pi!

LED Display playing a clone of Snake
Prototype at the Orlando Science Center

How it works?

We are using P10 LED panels as the basis for the screen. P10 means a 10mm dot pitch, so 10mm between each LED. They range from 3 – 10mm. The panels also usually come in a size of 16 x 32, but luckily they are daisy chainable!

The Raspberry Pi can even handle upto 32 of them in 3 chains! For our purposes we only used 8 16×32 panels in one chain.

8 P10 Panels, daisychained to an Adafruit LED matrix bonnet, connected to a Raspberry Pi 3b+, with power distributed via a CFOL Distro 8 board.

The above picture may look complicated, but it’s not that bad.

8 P10 panels are daisy chained together using a standard HUB75 cable (it’s like an smaller IDE cable).

The panels are mounted together with the orange and red 3D printed brackets.

The first panel is connected to a Raspberry Pi 3B+ via an Adafruit LED matrix bonnet.

The power for the panels and the Pi comes from a 10amp DC supply, which plugs into the bonnet. The bonnet powers the Pi, and has two screw terminals for the voltage output. The +/- screw terminals connect to a CFOL Distro 8 PCB (in the center of the board) which takes the input and breaks it out to 8 screw terminals. We only need 4 since each cable powers two panels, but it gives us room to expand.

After that we use https://github.com/adafruit/rpi-fb-matrix to copy whats on the HDMI framebuffer out onto the LED matrix!

and Voila! You now have a giant low resolution display!

Many thanks to Adafruit for making such a great beginner tutorial that we could jump from, and building a great bonnet for the Pi!

Happy Making and a Happy New Year! Here’s to a wonderful 2019 everyone!

-Shea

Mar 07

AdvanceMAME 3.4 for the Raspberry Pi Zero

Hey All,

AdvanceMAME 3.4 has been released with a lot of enhancements for the Raspberry Pi.

I got a message that it wasn’t working, so I recompiled a version JUST for the Raspberry Pi Zero.  This is meant to run on the latest version of Jessie with Pixel.

Get it here

To Install and play, run these commands from the command line

sudo dpkg -i advancemame_3.4-1_armhf.deb
advmame

This will install and create your AdvanceMAME folders.  Now place your ROMs in:

/home/pi/.advance/roms

Then run:

advmame romname
example: advmame sf2

AdvMAME should now start playing your game file.

Have fun!

-Shea

May 28

Politics and PCBs

Hey All,

This has been a fun month.  Between campaigning, work, and Raspberry Pi stuff, I’ve been busy 😀

Politics

So I’ve been campaigning a lot this month.  I am running for the District 49 Representative in Florida’s House.  I love my district.  One thing that is crazy to me is the amount of money being put into this election.  I have raised around $2000.  I’m very proud of that number.  It’s coming from friends and family who believe in me.  It’s humbling.  My Republican opponent has raised around ~$7000.  I’m sure it’s more now. And now there is a second Republican who has entered the race.  On the other side, my Democrat opponent has raised over $90,000!  $90,000.  That is an absurd amount of money for a State House race.  I’ve heard the average is around $40,000.  

That is insane to me.  That’s a scholarship, a car, someone’s student loans.  And instead it’s going to a campaign for ad buys and t shirts.  I hate it.  I truly believe campaigns should be publicly funded at all levels.  On that note, I can’t help but see the irony in me asking for donations: https://donate.sheasilverman.com

PCBs

In other news, the first revision to the PiPlay Advance PCBs came in, and they are awesome!

Conferences

This week I was in San Antonio, Texas for the IMS Global Learning Impact Leadership Institute conference, where I gave two presentations on the LTI (Learning Tools Interoperability) standards.  I was also there because my team at UCF won 2nd place in the LTI App Challenge for ProctorHub, our free passive proctoring software!

 It was a very different conference than I am used too.  Most of the software conferences I have been to have been very low level.  Getting into the nuts and bolts of how things work.  These educational conferences are very high level.  It’s an interesting paradigm change but I think we got some good stuff done.  I was able to give anecdotal evidence regarding some of the gaps in the current standards, and what could be done to improve them at all levels.  Stuff I introduce today will help to change the shape of educational software in the next few years.  

MegaCon is also this weekend.  I’ll have some pictures up from that event soon.

Have a good weekend!

-Shea

Feb 12

Friday Post: StepMania on Raspberry Pi2

Hey All!

So this week the Raspberry Pi Foundation released a new version of Raspbian that includes experimental support for OpenGL.  This is a big leap from OpenGL ES.  This is real OpenGL that tons of games and software use.  No mobile versions required anymore.  That being said, its super experimental.  It basically breaks the official screen and the camera doesn’t work.  It also only works in xwindows and not on the command line.

BUT! One of my favorite games (and the way I lost 50lbs) is now available on the Pi!  StepMania!  The Dance Dance Revolution simulation game!

Here’s how to compile it:

First clone the StepMania repo:

git clone https://github.com/stepmania/stepmania stepmania
cd stepmania

Install the dependancies:

sudo apt-get install cmake gcc g++ libmad0-dev libgtk2.0-dev binutils-dev git-core make libasound2-dev yasm libc6-dev libogg-dev libvorbis-dev libbz2-dev zlib1g-dev libjpeg8-dev libpng12-dev libxtst-dev libxrandr-dev libglew-dev libglu1-mesa-dev mesa-common-dev automake autoconf libva-dev

A lot of these you will probably already have installed.

Now cd into the Build directory and start the configuration process (and run it one more time afterwards)

cd Build
cmake ..
cmake ..

Now you will want to edit the CMakeCache.txt which has some of the configuration options.

nano CMakeCache.txt
Look for CRASH_HANDLER and set it to OFF, SSE2 should be set to OFF, and Full Release should be set to ON.
press ctrl-x then y to save.

Now lets compile StepMania!

make

Let that run until it is done, should take about 3 or 4 hours.  When it’s complete run

cd .. 
./stepmania

and you should now be playing StepMania!

All of your configurations  will be under ~/.stepmania, and your songs and stages go under ~/stepmania

Have Fun!

Also, GO SEE DEADPOOL (if you are 18 and older!!)

-Shea

Nov 27

Friday Post: Raspberry Pi Zero

Hey All!

Happy Friday, Happy Thanksgiving, Happy Black Friday, Happy Raspberry Pi Zero Day!

So yesterday the Raspberry Pi Foundation launched a new Raspberry Pi board, the Zero.

rsz_img_4054It’s TINY!  And only $5 dollars.  So far it’s a Pi 1 clocked at 1ghz, 512MB of RAM, Micro USB for power, Micro USB for peripherals, GPIO pins but without headers, and a mini HDMI port.  The latest edition of the MagPi is going to include one in every issue.

They already seem to be sold out online, but I was able to get the starter pack on Adafruit for 29.99.  It was worth it since I don’t have a mini HDMI or micro USB to full USB adapter.

Adafruit $5 Raspberry Pi Zero

Adafruit $29.99 Raspberry Pi Basic Pack

Right now I’m full of Turkey, and spending time with family.  I hope you all get to enjoy this time as well.

Have a great weekend!

-Shea


Nov 20

Friday Post: IAAPA 2015

Hey All,

Happy Friday!

I was lucky enough to be able to attend a day of IAAPA again this year.  IAAPA is THE worldwide Arcade and Amusement expo.  I’m fortunate that it takes place in Orlando, FL, otherwise I wouldn’t be able to get this opportunity.

One of the highlights of the trade show was that Sega was there showing off the new to North America “Luigi’s Mansion Arcade”.  This has been in Japan for two years now, but this is the first time (other than one location test) that a Luigi’s Mansion Arcade unit has been in the States.  It’s a very neat game.  It’s an on rails shooter game, where your gun is an all in one flashlight and vacuum cleaner.  You stun the ghosts with the flashlight, then suck them into your vacuum.  It’s a lot of fun, and I hope it gets translated and a few places pick them up.

In Raspberry Pi related news, the Mag Pi has just released their Official Raspberry Pi Projects Book!

Pi-Projects_Cover-495x700

 https://www.raspberrypi.org/blog/official-raspberry-pi-projects-book/

200 pages of things to do with your Raspberry Pi!

Enjoy all!  Have a great weekend!

-Shea