Aug 12

Descent Tutorial

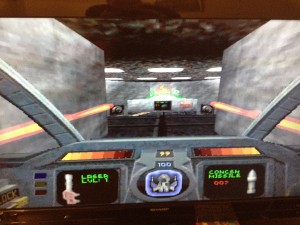
Today I present a tutorial on compiling Descent for your Raspberry Pi running Raspbian.  At the end of this tutorial you should have binaries ready to go and and a playable version of the game Descent.  If you don’t want to wait for the compile, I have the binaries ready for you.  Just skip to the end.

  1. Install the required dependancies
    1. sudo apt-get install libsdl1.2debian libsdl-mixer1.2 libsdl-mixer1.2-dev libsdl-image1.2 libsdl-image1.2-dev libsdl-ttf2.0-0 libsdl-ttf2.0-dev libsdl-net1.2 libsdl-net1.2-dev gcc-4.7 scons libphysfs-dev
  2. cd ~/
  3. mkdir descent
  4. cd descent
  5. Download the needed source code:
    1. wget http://sourceforge.net/projects/dxx-rebirth/files/dxx-rebirth/0.57.3/d1x-rebirth_v0.57.3-src.tar.gz
    2. wget http://sourceforge.net/projects/dxx-rebirth/files/dxx-rebirth/0.57.3/d2x-rebirth_v0.57.3-src.tar.gz
  6. Download the needed patches:
    1. wget http://www-user.tu-chemnitz.de/~heinm/tmp/d1x-rebirth-rpi.diff.gz
    2. wget http://www-user.tu-chemnitz.de/~heinm/tmp/d2x-rebirth-rpi.diff.gz
  7. Unzip the source files and the patches:
    1. tar xvfz d2x-rebirth_v0.57.3-src.tar.gz
    2. tar xvfz d1x-rebirth_v0.57.3-src.tar.gz
    3. gunzip d1x-rebirth-rpi.diff.gz
    4. gunzip d2x-rebirth-rpi.diff.gz
  8. You now have to patch the source code with the diff files.
    1. cd into the source code directories.
      1. Descent 1
        1. cd ~/descent/d1x-rebirth_v0.57.3-src/
        2. patch -p1 < ../d1x-rebirth-rpi.diff
      2. Descent 2
        1. cd ~/descent/d2x-rebirth_v0.57.3-src/
        2. patch -p1 < ../d2x-rebirth-rpi.diff
  9. We are now ready to compile!
  10. On the command line enter these two commands:
    1. export CC=gcc-4.7
    2. export CXX=g++-4.7
  11. Descent 1
    1. cd ~/descent/d1x-rebirth_v0.57.3-src/
    2. scons raspberrypi=1
      1. Wait around 30 – 40 minutes.
      2. If there are no errors you should now have a d1x-rebirth executable file in your directory!
  12. Descent 2
    1. cd ~/descent/d2x-rebirth_v0.57.3-src/
    2. scons raspberrypi=1
      1. Wait around 30 – 40 minutes.
      2. If there are no errors you should now have a d2x-rebirth executable file in your directory!
  13. You now need the data files that holds the actual game levels, sounds, artwork, etc.  These are in .hog, .pig, and .ham (descent 2 only) files.  You can get the game content from dxx-rebirth, the creators of this port.  They also have links to the shareware files:
    1. http://www.dxx-rebirth.com/game-content/
    2. http://www.dxx-rebirth.com/download/dxx/content/descent-pc-shareware.zip
    3. http://www.dxx-rebirth.com/download/dxx/content/descent2-pc-demo.zip
  14. Unzip those files by running unzip filename
  15. copy descent.hog and descent.pig to ~/descent/d1x-rebirth_v0.57.3-src/
  16. copy D2DEMO.HAM, D2DEMO.HOG and D2DEMO.PIG  to ~/descent/d2x-rebirth_v0.57.3-src/
  17. You are now ready to play!
    1. Descent 1
      1. cd ~/descent/d1x-rebirth_v0.57.3-src/
      2. ./d1x-rebirth -hogdir . (yes, thats a period at the end that must be there)
    2. Descent 2
      1. cd ~/descent/d2x-rebirth_v0.57.3-src/
      2. ./d2x-rebirth -hogdir .
  18. ENJOY!!


I realize these are a lot of instructions, but I wanted to make them as verbose as possible.
Below are the precompiled binaries with shareware data files already copied over.

Descent 1 Binaries | Descent 2 Binaries

Please let me know if any of this doesn’t work for you.  I wrote down every single step I did when I compiled it, but I’m afraid I may have missed something.  Let me know and I’ll correct it!

-Shea
Jul 31

Raspbian on Raspberry Pi – MAME, MESS, Quake3, NeoGeo, and Cave Story Binaries

Initial impressions with Raspbian.  Everything seems to be either playable or faster than before.

  • MESS is noticably faster.
  • MAME was a LITTLE faster (it all depends on the game).
  • Gngeo (Neo Geo) was still playing at full speed.
  • Cave Story works fine as long as music is disabled.
  • Quake 3 Arena plays but sometimes crashes (as seen in the video)

Binaries are available below:

Let me know if something doesn’t work or if you need help.  Hope everyone likes these!  Thanks to those who helped put some of these binaries together!

Tutorials Available Here

Mar 27

PhoneGap 1.5.0 and iOS 5.1

Hey All,

Just posting here so I remember some fixes I had to do with the new release of PhoneGap 1.5 (also known as Cordova).

When you initially run your new xCode product, you will get a ton of “semantic” issues.  The fix is to go to Build Settings -> Objective-C  Automatic Reference Counting -> “NO”

I found this clarification from a comment posted by Alejandro Orduz at http://phonegap.com/2012/03/06/phonegap-1-5-released/ 

“ok, i manage to make it work, Cordova, under Xcode 4.3.1…. regarding the www stuff…

First of all, getting into this painful process(more of all because of my lack of knowledge of Xcode), i wen to the process to upgrade my iPhone to the latest iOS 5.1, then had to upgrade Xcode to 4.3.1 to support testing in this device, but also did an upgrade to the latest lion 10.7.3…. so it was a boring weekend of upgrading….

The first time you run a new phone gap project under Cordova, is not like old days, now when you run you get a scary 9 errors warnings about a Semantic Issue in some, NSAutoreleasePool well, for some of us, that is like speaking chinease… but it can be solved very easy… the new Xcode has some Automatic Reference Counting ON by default, so you just go to the project Build Settings, find Objective-C  Automatic Reference Counting and change it to “NO”, after that everything goes to normal…. then it can build, add the www, you get the normal iPhone simulator error, and then, like before, had to drag and drop the www folder into the project root….

Changes like this are very scary for people like me, that found phonegap an amazing tool to build mobile apps with our web development knowledge…. :-{  ”

Also! I finally got the camera example working.  I was receiving a weird “wait_fences: failed to receive reply: 10004003” when I used the Camera example code verbatim.  It would work, but I would only recieve a small blue box on my iPhone.

The issue is that the code on line 40:

smallImage.src = “data:image/jpeg;base64,” + imageData;

is wrong.  PhoneGap 1.5 / iOS 5 stores the taken photo in a temporary directory, so you dont get the base64 data anymore, you have the actual URI for the photo in imageData.  All you need to do is change line 40 to be:

smallImage.src =  imageData;

and it will work.


I hope this helps out some people.  It’s working for me, YMMV.

-Shea